Category Archives: Assignments

AR & VR Technology

By Nijes Uparati

Augmented Reality (AR) and Virtual Reality (VR) are buzzwords these days; literally every magazine and newspaper has articles boasting the AR/VR craze. But where do we really stand on the AR/VR development? What are its implications? And what sort of applications should we really seek? These are questions troubling the scientists and developers alike who delve deeper into their disciplines to invent and design technologies that are on par with current technological needs.

Just as a brief overview: VR is a interactive technology generated within a simulated environment that embraces the elements of real world but limits interactions within the digital. AR on the other hand is a technology that allows the augmentation of our everyday interaction with real world with various sensory modalities such haptics, auditory or visual. We are going to alternate between both technological sides to post mixed finding on the subject matter. 

How is the art world benefited by the recent advances in VR/AR technology?
Recently a digital museum opened in Tokyo, Japan. This museum is a collaborative work of individuals from various disciplines including computer science, art, and human-computer interaction to name a few. The museum, hosted in a space of 10,000 square meter, is operated by using the about 520 computers and 470 projectors working in sync to create amazing visual experience for the visitors.

VR as an Art Medium
Recent advances in VR technology has paved ways for exploring the art domain with mediums that are far from the traditional. One such technological breakthrough is the idea of art in 3D digital space. Google’s Tilt brush technology combined with commercially available VR headsets like HTC VIVE and OCULUS RIFT could equip artists with an entirely new way to explore the art world.

From Wall-Following to Full Autonomy

By Wenchao Liu

When I was a happy college student at Lawrence, I made a wall-following RC car. The project was truly a blessing, because it led me to many amazing people such as Prof. Stoneking and Angela. My theoretical-physicist-turned-computer-scientist professor, Prof. Gregg, helped me a lot during the process as well. My presentation day was one of my proudest days, as I was showing a room of my professors that I was actually not that dumb. 

It’s been a year since that presentation day, and I am still living in the past. Currently I am building the second version of the car, following instructions on f1tenth.org. The second version has quite a few improvements over the first one, and I have learned quite a lot so far. This post is about such improvements and what I plan to do in the future. It’s like the project proposal I gave in college, which wasn’t fully executed.

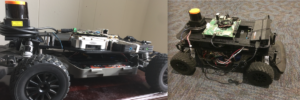
The most obvious improvement is a mechanical one. The previous build has two layers of plastics, which are connected also by plastics. As a result, the build is not rugged and glue was frequently applied. The new build has only one layer of plastics, and it’s mounted on a lower level than the base layer of the old build.

Just One Layer!

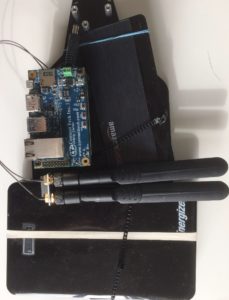
The electrical improvement is less obvious, but still visible. I had to changed the brushed motor to a brushless one, and to buy a VESC to control that. Thus, a Teensy micro-controller is not longer needed, as the computer can just control the VESC directly. The second build also uses an Orbitty carrier board, which has a smaller form factor than the previous one. Form factor; what a jargon word!

Can you tell which one is the current one?

The software improvement is not even visible as all, but it’s always been most frustrating. Although the only functionality I had with the previous build was wall-following, the car could actually do a lot more. The main functionalities I am trying to implement now are mapping with Lidar, localizing the car, generating and following waypoints. That’s where the f1tenth.org stops, but I won’t stop learning for a long time!

Stay tuned!

Makerspace Assignments for Existing Courses

At a presentation to our faculty over the summer, we had the opportunity to share some of the awesome ways our makerspace and its tools and equipment can be integrated into a wide range of academic disciplines. Some of what we talked about is on our assignments by subject page.  We were a little worried that all of the new project ideas could be overwhelming, however, especially when many faculty are interested in working with existing courses. In an effort to make things a little easier to digest, we came up with the following:

How to Integrate the Makerspace into your Courses:

  • Look at your courses and think about how a creative assignment or visualization might help in the understanding of a concept, event, place, etc.
  • Think about times during the course when many students had a difficult time understanding or staying engaged with the content and may have benefited from hands-on work or a change of scenery.
  • Do a library database search to find articles about different ways 3D printing & other makerspace tools have been integrated into your discipline.
  • Do a web search to find content about different ways 3D printing & other makerspace tools have been integrated into your discipline.
  • Contact your friendly makerspace coordinators. We have tons of ideas and are happy to chat about them!

It’s even available as an image, if you’d prefer! We know assignment design is a complex process, but we hope these tips can at least make it a little easier for faculty of all academic disciplines to provide high-tech, hands-on coursework for their students.

Scanning & Replicating Museum Collections

3D scanning of museum collections is an awesome use of 3D technologies that provides a way to share rare items with the world. Many museums and libraries have been sharing 3D scans of their collections, leading to an amazing selection of historical artifacts that can be viewed in a web browser, virtual reality headsets, and often even downloaded and 3D printed. Many can be found in Sketchfab’s collection of Cultural Heritage and History items and Scan the World’s collections in Myminifactory.

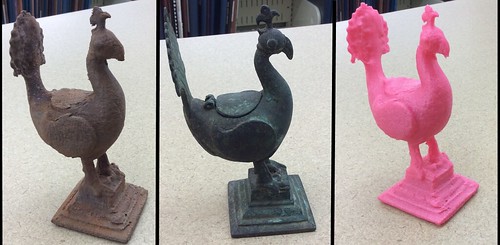
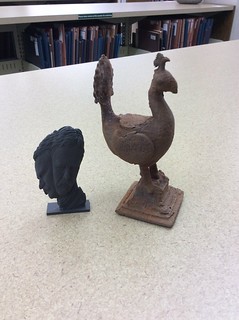
All three peacocks (original in the center)

This summer, we did a little experiment with 3D scanning an item from the collection of the Lawrence University Wriston Art Center Galleries.

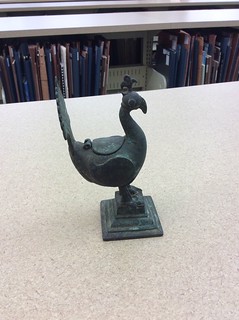
The original object: A 5.75 inch tall bronze inkwell from India.

The original, entitled Large inkwell, peacock design

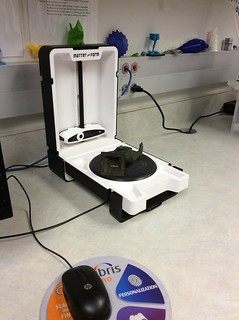
First, we scanned the inkwell in the program MF Studio on our Matter & Form 3D scanner. It took 3 scans merged together to get a mostly complete image. We did not attempt to capture the hinged cover on the peacock’s back (where the ink would be stored and the pen would be dipped.)

Third scan of the peacock, lying on its side.

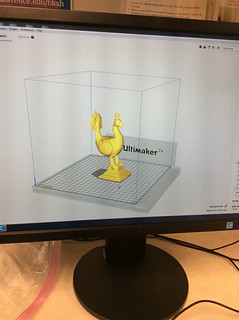
After cleaning up and merging the scans, we exported the file as an stl and prepared it for 3D printing in Cura.

Peacock file in the Cura slicing program.

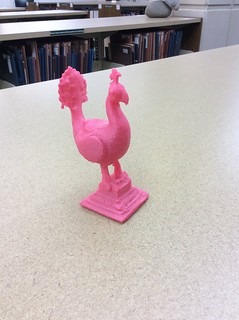
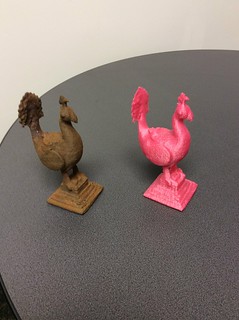
We printed replicas in two very different Proto-pasta PLA blend filaments, both using an Ultimaker 2+ 3D printer. First in Cupid’s Crush Metallic Pink HTPLA.

Cupid’s Crush Metallic Pink

Then we printed another using the Magnetic Iron Composite PLA. This filament can be hard on a print nozzle, which is why we were sure to use the Ultimaker 2+ printer. The 2+ nozzles can be fairly easily swapped, and only cost $11 to replace.
In addition to being magnetic, the iron blend is also rustable. We took the peacock print home for the weekend and used a solution of white vinegar, hydrogen peroxide, and table salt to try to give it an aged, rusted look. We coated the peacock with the solution, placed it in a sealed bread bag, then left it outside in the sun for the afternoon (shaking it occasionally to recoat the object in solution). Full instructions for this process can be found here, Improved Rusting Method for Iron Prints. The final product was pretty impressive, and looked more like something we dug out of the ground than something we had just 3D printed.

Peacock with one of Rob Neilson’s Teddy Box objects printed in the same filament that had not been rusted.


The two replicas together (in different light than the other photos).

Big thank you to our friend Beth Zinsli in the Wriston Art Center galleries for letting us scan one of the collection’s objects.