MyLU Insider

Uncategorized

Category: Uncategorized

Desk Stretches: See How They’re Done

To prevent or reduce stiffness and pain from sitting all day, try simple desk stretches.

The problem: Prolonged sitting

If you work at a desk or computer for long stretches of time, you might place excessive stress on certain muscles. As a result, you’re likely to get stiff and sore — unless you take frequent breaks for physical activity.

The solution: Fitness breaks

Breaking up your workday with stretches and other physical activities can help keep you comfortable while you work. You can stretch while you’re seated at your desk or standing in your workspace. You might even be able to stretch while you’re participating in a conference call or other workplace activities. You don’t need special equipment to stretch, and you won’t break a sweat — yet the results can be powerful.

Try a few of the stretches below, which can be done right from the comfort of your work area (watch the videos by Mayo Clinic Staff to understand proper form and technique):

  • Neck stretches: Video [1:27]
    Bring your chin to your chest and hold for 15 to 30 seconds. Then rotate your head left and then right, holding 15 to 30 seconds on each side. Finally, tilt your head to the side, leaning your ear toward your shoulder. Again, hold for 15 to 30 seconds on each side.
  • Forearm stretches: Video [1:38]
    Lift one of your arms and hold it comfortably in front of you, palm facing down. Bend your hand downward, and gently pull it toward you using your other hand. Hold for 15 to 30 seconds and repeat on the other side. Then lift one of your arms and hold it comfortably in front of you, palm facing up. Bend your hand downward, and gently pull it toward you using your other hand. Again, hold for 15 to 30 seconds on each side.
  • Upper body stretches: Video [1:22]
    To stretch the back of your shoulders, place one hand under your elbow. Lift your elbow and stretch it across your chest. Don’t rotate your body as you stretch. Hold the stretch for 15 to 30 seconds. You’ll feel tension in the back of your shoulder. Relax and return to the starting position and repeat the stretch with the other arm.
    • To stretch the backs of your arms, lift one arm and bend it behind your head. Place your other hand on your bent elbow to help stretch your upper arm and shoulder. Hold the stretch for 15 to 30 seconds. Relax and return to the starting position and repeat the stretch with your other arm.
    • To stretch the muscles of your chest, squeeze your shoulder blades together. To get a better stretch, place your hands behind your head and pull your bent arms backward. Hold the stretch for 15 to 30 seconds. Relax and return to the starting position.
  • Seated stretches: Video [1:19]
    While seated, bring one of your knees toward your chest. Use your hands to grab the back of your thigh, and gently pull it toward you. Keep your back straight, being careful not to lean forward. Hold the stretch for 30 seconds. Relax and return to the starting position, and repeat the stretch with your other leg.
  • Standing stretches: Video [1:15]
    While standing, put a hand on your desk or chair to stabilize yourself. Bend one leg, grab your ankle and pull it toward your buttock. Hold for 15 to 30 seconds, then repeat on the other side. Then, stand with feet hip width apart and arms crossed across your chest. Twist to the left, then the right. Hold for 30 seconds on each side.

“Just a small amount of movement throughout the day can really help you stay alert and focused.” Beau Johnson is a physical therapist in Holmen, Wisconsin.

Want more stretching examples? Check this out.

15 Simple and Quick Office Stretches to Boost Work Efficiency


Image of overhead stretch being performed by an office worker.

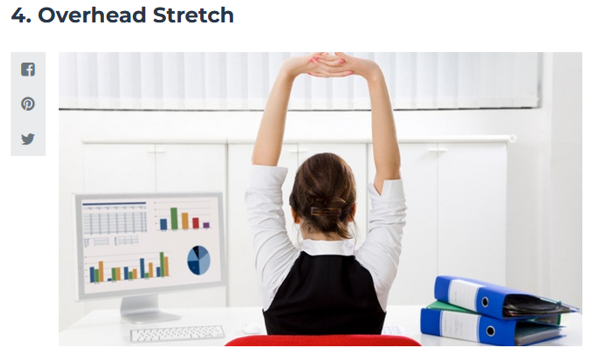
Example number 4, is a natural stretch that we all do when we’re feeling a bit stiff and tired. Simply raise your arms above your head, interlock your fingers and push away from yourself.

Sources: https://www.mayoclinic.org/healthy-lifestyle/adult-health/in-depth/office-stretches/art-20046041; https://www.lifehack.org/articles/productivity/15-simple-and-quick-office-stretches-boost-work-efficiency.html

Spring Food Drive

Until March 24th

Help us stock the Student Food Pantry for our Lawrentians!

What We Need:

  • Pull tab canned fruits and vegetables
  • Microwaveable entrees
  • Rice
  • Beans
  • Dry pasta
  • Peanut Butter
  • Jelly
  • Juice
  • Granola Bars
  • Almond and coconut milk
  • Cereal

Drop off donations in the D&IC kitchen in Memorial Hall or email jessica.quintana@lawrence.edu

Visit the Pantry website for more information.

Are you Interested in Being a Posse Mentor?

Are you interested in being a Posse Mentor?

To apply for the Posse Mentor position please complete this form: https://forms.office.com/Pages/ResponsePage.aspx?id=221GfoWP4U6xMj_yZFxlSYJ4H3BoSTVNnPSJRRNwzX5UNjk5M1NNWVI5V1A2U04xRkNWRlJOSEoxVS4u. Deadline to apply is April 1, 2022

Q&A Session to learn more about the position and program will be hosted towards the end of March. Details will be shared on a later date.

If you have any questions please email Brittany.m.bell@lawrence.edu.
To learn more about the Posse Foundation visit: https://www.possefoundation.org/


Spring Cleaning – Choosing the Safest Chemical

Always choose the cleaner, sanitizer or disinfectant product with the least hazardous ingredients that will accomplish the task at hand. Read the label to understand how to properly use the product, and follow any safety and precautionary statements provided on the label.

Workplaces use cleaning chemicals to ensure the cleanliness of their buildings. Workers who handle these products include building maintenance workers, janitors and housekeepers. Some cleaning chemicals can be hazardous, causing problems ranging from skin rashes and burns to coughing and asthma.

The Environmental Protection Agency (EPA) defines cleaners, sanitizers and disinfectants as follows:

Cleaners remove dirt through wiping, scrubbing or mopping.

Sanitizers contain chemicals that reduce, but do not necessarily eliminate, microorganisms such as bacteria, viruses and molds from surfaces. Public health codes may require cleaning with the use of sanitizers in certain areas, like toilets and food preparation areas.

Disinfectants contain chemicals that destroy or inactivate microorganisms that cause infections. Disinfectants are critical for infection control in hospitals and other healthcare settings.

Cleaners, sanitizers and disinfectants serve different purposes, and it is important to choose the least hazardous cleaning chemical that will accomplish the task at hand. Before purchasing cleaning products, determine whether or not sanitizing or disinfecting is necessary. If sanitizing or disinfecting is not required, then choose a cleaner. In general, disinfectants and sanitizers are more hazardous than cleaners.

If sanitizing or disinfecting is necessary, be sure that the product purchased is effective for the microorganisms being targeted. EPA regulates sanitizers and disinfectants (termed “antimicrobial pesticides”). For further information, see EPA’s webpage “What Are Antimicrobial Pesticides?” (www.epa.gov/pesticide-registration/what-are-antimicrobial-pesticides ).

 Potential Health Problems Caused by Cleaning Chemicals

Many factors influence whether a cleaning chemical will cause health problems. Some important factors to consider include:

  • Chemical ingredients of the cleaning product;
  • How the cleaning product is being used or stored;
  • Ventilation in the area where the cleaning product is used;
  • Whether there are splashes and spills;
  • Whether the cleaning product comes in contact with the skin; and
  • Whether mists, vapors and/or gases are released.

Chemicals in some cleaning products can be irritating to the skin or can cause rashes. Cleaning products that contain corrosive chemicals can cause severe burns if splashed on the skin or in the eyes (e.g.; drain cleaners, toilet bowl cleaners, acid-based cleaners).

Mists, vapors and/or gases from cleaning chemicals can irritate the eyes, nose, throat and lungs. Symptoms may include burning eyes, sore throat, coughing, trouble breathing and wheezing. Mixing cleaning products that contain bleach and ammonia can cause severe lung damage or death.

Safe Work Practices When Using Cleaning Chemicals

  • Never mix cleaning products that contain bleach and ammonia;
  • If cleaning chemicals must be diluted, follow instructions on how to correctly dilute the cleaners;
  • Follow label directions on the use, storage and emergency spill procedures;
  • Use the proper protective equipment needed, such as gloves and goggles;
  • Ensure that all containers of cleaning products and chemicals are labeled to identify their contents and hazards (e.g.; when transferring the product into another container or spray bottle);
  • Make sure there are operating ventilation systems as needed during cleaning tasks to allow sufficient air flow and prevent buildup of hazardous vapors; and
  • Always wash up with soap and water after using cleaning chemicals.
Image of Safer Choice product label.

Criteria for Safer Chemical Ingredients – https://www.epa.gov/saferchoice.

Each chemical ingredient in a formulation has a function in making a product work – whether it is to aid in cleaning by reducing surface tension (surfactants), dissolve or suspend materials (solvents), or reduce water hardness (chelating agents). The Safer Choice Program evaluates each ingredient in a formulation against the following Master and Functional-Class Criteria documents, as appropriate. These documents define the characteristics and toxicity thresholds for ingredients that are acceptable in Safer Choice products.

Sources: OSHA/NIOSH INFOSHEET: Protecting Workers Who Use Cleaning Chemicals; Safer Choice Standard and Criteria, https://www.epa.gov/safechoice/standard.

Final Winter Term Faculty Lunch

One last faculty lunch for the Winter 2022 term! Join colleagues for a BYO lunch in the Viking Room on Friday, March 4 (week 9) from 12:30 to 1:30 pm.

No alcohol will be served, but there will be a complimentary coffee and tea cart for your mid-day caffeine fix. Stop by to grab a cup even if you can’t stay for lunch – seriously, come get a hot beverage!

Viking Room, Memorial Union, 1970, Lawrence University Archives, ARC2009-047

Brighter Together Term Closing Ceremony

Winter Term Closing for all Lawrentians will take place in the Somerset Room on Friday, March 11th at 4:30 pm. and will close with a community walk to the Goldgarden to release our regrets, gratitude, and prayers for the term. 

Spiritual and Religious Life invites you to take time to acknowledge a turning and the impact that this term has had on our community, our relationships, our knowledge, our dreams, and our souls.  When we pause to see from multiple perspectives then it is possible to hold hard and joyful, growth and struggle, loneliness and community in the same space.  We hope you will plan to resist isolation and be part of a shared experience. 

Choosing the Right Ladder and Basic Ladder Safety

The environment of your work site is the first factor in choosing the material from which your ladder is constructed. Ladders are built from one of three basic materials: wood, fiberglass and metal (aluminum). For example, if you are working near sources of electricity, a metal ladder should be rejected since aluminum is an electrical conductor.

DO NOT use aluminum ladders when working near electricity.

Your body can complete an electrical circuit between the electrical power source, the ladder, and then to the ground in the event of a live wire contact incident. An electrical shock while working from a ladder can trigger a fall or cause your heart to stop leading to serious injury or death. On the other hand, if there are no electrical power sources in your work area, the aluminum ladder is the lightest weight when compared to fiberglass or wood.  

After checking the environment of the work site, and where the ladder will be setup, the proper ladder length must be selected. It is unsafe to use a ladder that is too long or too short. When using a Step Ladder, for example, standing on the top cap or the step below the top cap is not permitted due to the increased likelihood of losing your balance. Likewise, when using an Extension Ladder, the top three rungs are not to be used for climbing. Safety standards require a label on the ladder to indicate the highest standing level.


Image of the many different types and sizes of ladders – Safetyhub.

Next, consider the Duty Rating of the ladder. This is an indication of the maximum weight capacity the ladder can safely carry. To figure out the total amount of weight your ladder will be supporting, add your weight plus all tools, supplies, and other objects placed upon the ladder.

There are five categories of ladder Duty Ratings:

  1. Type IAA (Extra Heavy Duty) capacity 375 pounds
  2. Type IA (Extra Heavy Duty) capacity 300 pounds
  3. Type I (Heavy Duty) capacity 250 pounds
  4. Type II (Medium Duty) capacity 225 pounds
  5. Type III (Light Duty) capacity 200 pounds
Image of Duty Rating label Max. Load Capacity 300 LBS.

Basic Ladder Safety

Ladders are tools.  Many of the basic safety rules that apply to most tools also apply to the safe use of a ladder:

  • If you feel tired or dizzy, or are prone to losing your balance, stay off the ladder.
  • Do not use ladders in high winds or storms.
  • Wear clean slip-resistant shoes.  Shoes with leather soles are not appropriate for ladder use since they are not considered sufficiently slip resistant.
  • Before using a ladder, inspect it to confirm it is in good working condition. 
    • Ladders with loose or missing parts must be rejected. Rickety ladders that sway or lean to the side must be rejected.
  • The ladder you select must be the right size for the job.
    • The Duty Rating of the ladder must be greater than the total weight of the climber, tools, supplies, and other objects placed upon the ladder. The length of the ladder must be sufficient so that the climber does not have to stand on the top rung or step.
  • When the ladder is set-up for use, it must be placed on firm level ground and without any type of slippery condition present at either the base or top support points.
  • Only one person at a time is permitted on a ladder unless the ladder is specifically designed for more than one climber (such as a Trestle Ladder).
  • Ladders must not be placed in front of closed doors that can open toward the ladder. The door must be blocked open, locked, or guarded.
  • Read the safety information labels on the ladder.
    • The on-product safety information is specific to the particular type of ladder on which it appears. The climber is not considered qualified or adequately trained to use the ladder until familiar with this information.
Image of ladder safety labels.

At all times utilize Three Points-of-Contact

When climbing a ladder, it is safest to utilize Three Points-of-Contact because it minimizes the chances of slipping and falling from the ladder.  At all times during ascent, descent, and working, the climber must face the ladder and have two hands and one foot, or two feet and one hand in contact with the ladder steps, rungs and/or side rails.

Always maintain three points-of-contact with the ladder.

Although the user’s weight or size typically does not increase the likelihood of a fall, improper climbing posture creates user clumsiness and may cause falls. Reduce your chances of falling during the climb by:

  • wearing slip-resistant shoes with heavy soles to prevent foot fatigue;
  • cleaning the soles of shoes to maximize traction;
  • not carrying objects in either hand that can interfere with a firm grip on the ladder, use towlines, a tool belt or an assistant to convey materials
  • climbing slowly and deliberately while avoiding sudden movements;
  • never attempting to move a ladder while standing on it;
  • keeping the center of your belt buckle (stomach) between the ladder side rails when climbing and while working.  Do not overreach or lean while working so that you don’t fall off the ladder sideways or pull the ladder over sideways while standing on it.

Factors contributing to falls from ladders include haste, sudden movement, lack of attention, the condition of the ladder (worn or damaged), the user’s age or physical condition, or both, and the user’s footwear.

Image of worker twisting and turning on a ladder.
Werner Ladder Safety Video Link

Follow these basic and important safety rules when using a ladder to reduce your chances of falling while using a ladder at work or at home.

Source: https://www.americanladderinstitute.org/page/Ladders101

Display Screen Equipment – Identifying Hazards and Reducing Risks

Tasks requiring prolonged use of Display Screen Equipment (DSE) can present real hazards to users. Use of DSE equipment requires proper management to control the hazards and reduce the risks to display screen equipment users.

Equipment categorized as display screen equipment include: desktop and laptop computers, tablets, smartphones, LCD monitors, and all varieties of touchscreens (alphanumeric or graphic) .

The three main hazards of prolonged use of display screen equipment are musculoskeletal injuries, visual fatigue and stress.

Musculoskeletal Injury (MSI)
An injury or disorder of the soft tissues, including tendons, ligaments, blood vessels and nerves, arising from exposure to risk factors such as:

  • Static position for lengthy periods of time
  • Bending and twisting
  • Repeating an action too frequently
  • Uncomfortable working position
  • Exerting too much force
  • Working too long without break (e.g. looking at a screen for prolong periods of time)
  • Adverse working environment (e.g. hot or cold)
  • Not receiving and acting on reports of symptoms quickly enough.

Signs and Symptoms of Musculoskeletal Injuries
These can include tenderness, weakness, tingling, disturbed sleep, swelling, numbness, pain, unreasonable fatigue, and difficulty performing tasks or moving specific parts of the body. These injuries can be acute or cumulative. They result from one or more of these tissues having to work harder than they’re designed to.

Stages of Musculoskeletal Injuries

Early stage: Aching and tiredness of the affected limb occur during the work shift but disappear at night and during days off work. No reduction of work performance.

Intermediate stage: Aching and tiredness occur early in the work shift and persist at night. May also have reduced capacity for repetitive work.

Late stage: Aching, fatigue and weakness persist at rest. Inability to sleep and to perform light duties. Not everyone goes through these stages in the same way. In fact, it may be difficult to say exactly when one stage ends and the next begins. The first pain is a signal that the muscles and tendons should rest and recover. As soon as people recognize that they have a symptom, they should immediately do something about it.

Visual Fatigue: This occurs when a task involves looking at a screen for prolonged periods of time. Eyestrain and headaches can result from visual fatigue.

Stress: Psycho-social factors (e.g. high job demands, time pressures and lack of control) can cause muscle tension and headaches.

Image of an adjustable workstation shown in the sitting and standing position. (Source: https://www.cmd-ltd.com)

This image depicts optimal sitting and standing posture. Please note, however, that no posture is ideal indefinitely. You must change your posture and position frequently by alternating tasks (typing, writing, walking and standing) as often as possible. This will ensure proper blood flow and reduce the risk of injury.

The individual’s own posture at the workstation plays a major role in preventing injury.

Variety is a key issue in addressing Display Screen Equipment issues: in some cases, repetitive or monotonous job tasks may be rotated, so that individuals are not required to do the same thing exclusively for prolonged periods.

Breaks are crucial in ensuring good health and safety in all work situations. To prevent the pain and discomfort of staying in one place for long periods, it’s useful to step away, get a drink or just go for a walk to stretch the legs, and at the same time give your eyes a rest from the screen.

Exercise is another way to break up the day, stretching (activities and positions used to increase range of motion), changing position, and looking away from your screen occasionally.

Musculoskeletal problems, visual fatigue and stress all increase the longer a person stays in one place doing the same thing, so breaking up the working day is a major part of maintaining health.

An assessment of the workstation design, environmental factors, task or job design can be performed to minimize the risk and possibility of injury to users. Check out the display screen equipment workstation checklist at https://www.hse.gov.uk/pubns/ck1.pdf

Sources: IOSHhttps://iosh.com/resources-and-research/our-resources/occupational-health-toolkit/musculoskeletal-disorders/preventative-action/ ; Safetyhub – Display Screen Equipment

Winter Conditions and Safe Driving Tips

The last few weeks of winter can create dangerous driving conditions. Temperature fluctuations that cause thawing and freezing weather bring icy roads, slippery ramps and overpasses. Rain later in the day may turn into a wintry mix of snow and sleet as temperatures drop below freezing.

Two basic ingredients of icy roads: freezing temperatures and any precipitation.

It’s important to know the common causes of winter car accidents and how to prevent them. Below are three winter conditions that can seriously inhibit your ability to drive safely.

Slick Roads 

Snow and ice accumulate on roadways during the winter months. Ice and snow make it difficult for tires to gain traction, in turn making it harder to turn, slow down, and stop a vehicle safely. When water freezes on road surfaces it can create black ice, which is hard to see and often causes drivers to lose control of their vehicles.

Slick road conditions can cause accidents such as:

  • Spin-out accidents: This type of crash happens when a driver loses all control of his or her vehicle because of a slick road surface. You can reduce the risk of spin-out accidents by slowing down, particularly when making a turn. If you feel your vehicle beginning to spin out, do not try to quickly correct the skid or slam on the brakes. Instead, turn the steering wheel in the direction of the spin and gradually correct yourself.
  • Sliding through intersections: The slippery surface of a road can prevent vehicles from stopping properly at red lights and stop signs, leading to collisions in intersections. The risk of these accidents can be minimized if drivers begin to reduce speed farther away from intersections in slick conditions. It is important for winter drivers to pay special attention to intersections and anticipate changes in traffic signals. 
  • Rear-end collisions: These occur when drivers cannot slow down or stop their vehicles before hitting the back of another car. The risk of rear-end collisions can be reduced by giving your vehicle extra space when driving in winter conditions. One of the best driving habits you can develop during the winter is to drive slowly and double, or even triple, your following distance.

Low Visibility

Visibility can be low in winter conditions. Falling snow and blowing sleet can make it hard to see even a few feet in front of your vehicle. Additionally, it can be difficult to see the road surfaces and markings when snow and ice are covering the ground. This can lead to lane-drifting accidents.

Pay attention to weather alerts and messages, they can warn you ahead of time of upcoming storms that cause visibility problems and dangerous road conditions.

Example of a National Weather Service Emergency Alert text message on 2/18/2022.

The risk of lane-drifting and other low-visibility accidents can be reduced by keeping an attentive eye on your surroundings. If you cannot see road markings, look for other vehicles’ tracks to follow, and maintain safe following distances at all times.

Poor Vehicle Maintenance

To drive safely in any weather environment, your vehicle must be in good condition. This is especially true for winter driving. When drivers fail to adequately maintain their vehicles, they put themselves and others on the road at considerable risk.

Just some of the many examples of poor vehicle maintenance that can cause winter accidents include:

  • Worn tires: When tire treads are worn down, vehicles lose traction and cannot slow down, stop, or turn properly on ice and snow. 
  • Bad windshield wipers: When a car’s windshield wipers are dull, and/or its defrost system is malfunctioning, drivers cannot see the road clearly. 
  • Burnt out headlights and taillights: Not only will you have trouble seeing in front of you when your headlights are out, but others will have a harder time seeing your vehicle when its headlights or taillights are out, or when they are covered in ice, snow, or road salt residue.

AAA recommends the following tips while driving in snowy and icy conditions:

Tips for Driving in the Snow

  • Drive slowly. Always adjust your speed down to account for lower traction when driving on snow or ice.
  • Accelerate and decelerate slowly. Apply the gas slowly to regain traction and avoid skids. Don’t try to get moving in a hurry and take time to slow down for a stoplight. Remember: It takes longer to slow down on icy roads.
  • Increase your following distance to five to six seconds. This increased margin of safety will provide the longer distance needed if you have to stop.
  • Know your brakes. Whether you have anti-lock brakes or not, keep the heel of your foot on the floor and use the ball of your foot to apply firm, steady pressure on the brake pedal.
  • Don’t stop if you can avoid it. There’s a big difference in the amount of inertia it takes to start moving from a full stop versus how much it takes to get moving while still rolling. If you can slow down enough to keep rolling until a traffic light changes, do it.
  • Don’t power up hills. Applying extra gas on snow-covered roads will just make your wheels spin. Try to get a little inertia going before you reach the hill and let that inertia carry you to the top. As you reach the crest of the hill, reduce your speed and proceed downhill slowly.

How to Correct a Slide on an Icy Road (and how to prevent them)

Educational winter driving video about preventing dangerous vehicle slides on icy roads, and what to do if one happens. Includes videos of actual accidents captured on camera.

https://www.youtube.com/watch?v=TZQXuWzBC18&feature=youtu.be  [13:03]

Car sliding out of control.

Modified from sources: https://www.wisconsinlawyer.com and https://www.exchange.aaa.com

Cold Stress Illnesses – Treatment and Prevention

Who is affected by environmental cold?

Environmental cold can affect any worker exposed to cold air temperatures and puts workers at risk of cold stress. As wind speed increases, it causes the cold air temperature to feel even colder, increasing the risk of cold stress to exposed workers, especially those working outdoors, such as snow cleanup crews, construction workers.

During emergency response activities or recovery operations, workers may be required to work in cold environments, and sometimes for extended periods. Cold stress is a common problem encountered in these types of situations.

Risk factors for cold stress include:

  • Wetness/dampness, dressing improperly, and exhaustion
  • Predisposing health conditions such as hypertension, hypothyroidism, and diabetes
  • Poor physical conditioning
Picture of OSHA banner OHSA Link to Plan. Equip. Train.

How cold is too cold?

When the body is unable to warm itself, cold related stress may result. This may include tissue damage and possibly death. Four factors contribute to cold stress: cold air temperatures, high velocity air movement, dampness of the air, and contact with cold water or surfaces. A cold environment forces the body to work harder to maintain its temperature. Cold air, water, and snow all draw heat from the body. Wind chill is the combination of air temperature and wind speed. For example, when the air temperature is 40°F, and the wind speed is 35 mph, your exposed skin receives conditions equivalent to the air temperature being 11° F. While it is obvious that below freezing conditions combined with inadequate clothing could bring about cold stress, it is also important to understand that it can also be brought about by temperatures in the 50’s coupled with some rain and wind.

How does the body react to cold conditions?

When in a cold environment, most of your body’s energy is used to keep your internal temperature warm. Over time, your body will begin to shift blood flow from your extremities (hands, feet, arms, and legs) and outer skin to the core (chest and abdomen). This allows exposed skin and the extremities to cool rapidly and increases the risk of frostbite and hypothermia. Combine this with cold water, and trench foot may also be a problem.

What are the most common cold induced problems?

Hypothermia, Frostbite, and Trench Foot.

What is Hypothermia?

Hypothermia which means “low heat”, is a potentially serious health condition. This occurs when body heat is lost faster than it can be replaced. When the core body temperature drops below the normal 98.6° F to around 95° F, the onset of symptoms normally begins. The person may begin to shiver and stomp their feet in order to generate heat. Workers may lose coordination, have slurred speech, and fumble with items in the hand. The skin will likely be pale and cold. As the body temperature continues to fall these symptoms will worsen and shivering will stop. Workers may be unable to walk or stand. Once the body temperature falls to around 85° F severe hypothermia will develop and the person may become unconscious, and at 78°, the person could die.

Treatment depends on the severity of the hypothermia. For cases of mild hypothermia move to warm area and stay active. Remove wet clothes and replace with dry clothes or blankets, cover the head. To promote metabolism and assist in raising internal core temperature drink a warm (not hot) sugary drink. Avoid drinks with caffeine. For more severe cases do all the above, plus contact emergency medical personnel (Call 911 for an ambulance), cover all extremities completely, place very warm objects, such as hot packs or water bottles on the victim’s head, neck, chest and groin. Arms and legs should be warmed last.
If worker is in the water and unable to exit, secure collars, belts, hoods, etc. in an attempt to maintain warmer water against the body. Move all extremities as close to the torso as possible to conserve body heat.

What is Frostbite?

Frostbite occurs when the skin actually freezes and loses water. While frostbite usually occurs when the temperatures are 30° F or lower, wind chill factors can allow frostbite to occur in above freezing temperatures. Frostbite typically affects the extremities, particularly the feet and hands. The affected body part will be cold, tingling, stinging or aching followed by numbness. Skin color turns red, then purple, then white, and is cold to the touch. There may be blisters in severe cases.

Treatment: Do not rub the area to warm it. Wrap the area in a soft cloth, move the worker to a warm area, and contact medical personnel. Do not leave the worker alone. If help is delayed, immerse in warm (maximum 105 °F), not hot, water. Do not pour water on affected part. If there is a chance that the affected part will get cold again do not warm. Warming and recooling will cause severe tissue damage.

What is Trench Foot?

Trench Foot or immersion foot is caused by having feet immersed in cold water at temperatures above freezing for long periods of time. It is similar to frostbite, but considered less severe. Symptoms usually consist of tingling, itching or burning sensation. Blisters may be present.

Treatment: Soak feet in warm water, then wrap with dry cloth bandages. Drink a warm, sugary drink. 

What preventive measures should I take?

Plan for work in cold weather. Wearing appropriate clothing and being aware of how your body is reacting to the cold are important to preventing cold stress. Avoiding alcohol, certain medications and smoking can also help to minimize the risk.

Protective Clothing is the most important way to avoid cold stress. The type of fabric also makes a difference. Cotton loses its insulation value when it becomes wet. Wool, on the other hand, retains its insulation even when wet. The following are recommendations for working in cold environments:

  • Wear at least three layers of clothing. An outer layer to break the wind and allow some ventilation (like Gortex® or nylon). A middle layer of down or wool to absorb sweat and provide insulation even when wet. An inner layer of cotton or synthetic weave to allow ventilation.
  • Wear a hat. Up to 40% of body heat can be lost when the head is left exposed.
  • Wear insulated boots or other footwear.
  • Keep a change of dry clothing available in case work clothes become wet.
  • Do not wear tight clothing. Loose clothing allows better ventilation.

Work Practices and planning are important preventative measures.
Supervisors, workers and coworkers should watch for signs of cold stress and allow workers to interrupt their work if they are extremely uncomfortable. Check the weather and wind conditions (feels like).

Screenshot of local weather.
This image has an empty alt attribute; its file name is Screenshot_20220209-Weather.png
Screenshot of 10-day forecast.
This image has an empty alt attribute; its file name is Screenshot_20220209-10-Day-forecast-2.png
Screenshot of Weather – current temp (feels like) and 10-day forecasts
  • Schedule frequent short breaks in warm dry areas, to allow the body to warm up.
  • Schedule work during the warmest part of the day.
  • Use the buddy system (work in pairs).
  • Provide warm, sweet beverages. Avoid drinks with alcohol.
  • Provide engineering controls such as radiant heaters, shielding work areas from drafts.
  • Provide personal protective equipment (insulated gloves).

Source: modified from OSHA site, https://www.osha.gov/winter-weather/cold-stress