My Experience With Laser Cutting

By Wenchao Liu

In anticipation of the laser cutter our Makerspace is going to purchase, I decided to write an introductory article about laser cutters. This article is about what laser cutters can or can’t do, when you should use one, and how you can get your hands on one in Appleton.

The first thing you should know about laser cutters is what they can or can’t do. They differ from 3D printers, because they generally can’t generate 3D shapes. However, as the name suggests, they can either cut through or engrave on a variety of materials, including plastics and glass.

When do you choose to use a laser cutter versus a 3D printer? We know that laser cutters can’t generate 3D shapes, but what if you want to create a piece of flat plastic chassis? You can theoretically use either one. That said, laser cutters generally have a bigger bed and takes a lot less time than 3D printers. You just need to buy the plastics yourself!

Where can you find laser cutters in Appleton while waiting for the one Angela promised to get us? There’s one in the Appleton Makerspace, whose website is https://appletonmakerspace.org, and one in the Fox Valley Technical College, whose website is https://www.fvtc.edu/employers/fab-labs. In addition, there are other services you can pay in Appleton. 

Maybe we can only wait until Angela puts one in the library. The reason why it’s been taking so long is that laser cutters generate a lot of heat, so as a result they require special ventilation equipment. We are getting a Glowforge, but their ventilation equipment—Air Filter won’t be available until April 2019. We can only wait!

Makerspace Assignments for Existing Courses

At a presentation to our faculty over the summer, we had the opportunity to share some of the awesome ways our makerspace and its tools and equipment can be integrated into a wide range of academic disciplines. Some of what we talked about is on our assignments by subject page.  We were a little worried that all of the new project ideas could be overwhelming, however, especially when many faculty are interested in working with existing courses. In an effort to make things a little easier to digest, we came up with the following:

How to Integrate the Makerspace into your Courses:

  • Look at your courses and think about how a creative assignment or visualization might help in the understanding of a concept, event, place, etc.
  • Think about times during the course when many students had a difficult time understanding or staying engaged with the content and may have benefited from hands-on work or a change of scenery.
  • Do a library database search to find articles about different ways 3D printing & other makerspace tools have been integrated into your discipline.
  • Do a web search to find content about different ways 3D printing & other makerspace tools have been integrated into your discipline.
  • Contact your friendly makerspace coordinators. We have tons of ideas and are happy to chat about them!

It’s even available as an image, if you’d prefer! We know assignment design is a complex process, but we hope these tips can at least make it a little easier for faculty of all academic disciplines to provide high-tech, hands-on coursework for their students.

Scanning & Replicating Museum Collections

3D scanning of museum collections is an awesome use of 3D technologies that provides a way to share rare items with the world. Many museums and libraries have been sharing 3D scans of their collections, leading to an amazing selection of historical artifacts that can be viewed in a web browser, virtual reality headsets, and often even downloaded and 3D printed. Many can be found in Sketchfab’s collection of Cultural Heritage and History items and Scan the World’s collections in Myminifactory.

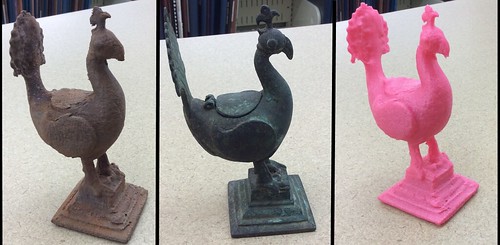
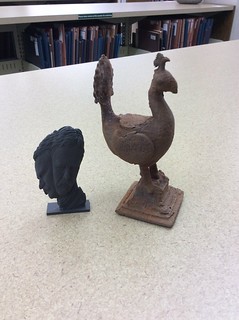
All three peacocks (original in the center)

This summer, we did a little experiment with 3D scanning an item from the collection of the Lawrence University Wriston Art Center Galleries.

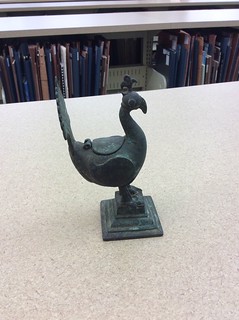
The original object: A 5.75 inch tall bronze inkwell from India.

The original, entitled Large inkwell, peacock design

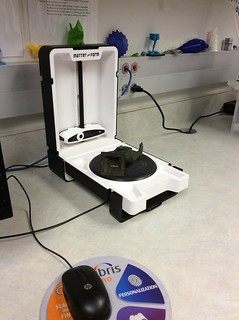
First, we scanned the inkwell in the program MF Studio on our Matter & Form 3D scanner. It took 3 scans merged together to get a mostly complete image. We did not attempt to capture the hinged cover on the peacock’s back (where the ink would be stored and the pen would be dipped.)

Third scan of the peacock, lying on its side.

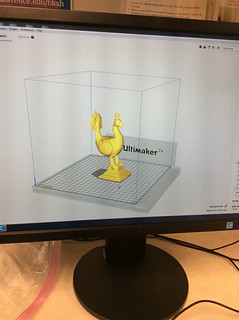
After cleaning up and merging the scans, we exported the file as an stl and prepared it for 3D printing in Cura.

Peacock file in the Cura slicing program.

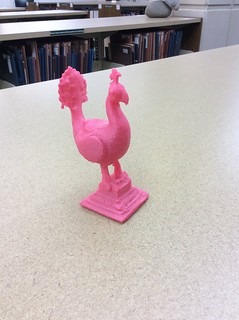
We printed replicas in two very different Proto-pasta PLA blend filaments, both using an Ultimaker 2+ 3D printer. First in Cupid’s Crush Metallic Pink HTPLA.

Cupid’s Crush Metallic Pink

Then we printed another using the Magnetic Iron Composite PLA. This filament can be hard on a print nozzle, which is why we were sure to use the Ultimaker 2+ printer. The 2+ nozzles can be fairly easily swapped, and only cost $11 to replace.
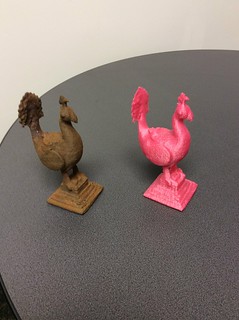
In addition to being magnetic, the iron blend is also rustable. We took the peacock print home for the weekend and used a solution of white vinegar, hydrogen peroxide, and table salt to try to give it an aged, rusted look. We coated the peacock with the solution, placed it in a sealed bread bag, then left it outside in the sun for the afternoon (shaking it occasionally to recoat the object in solution). Full instructions for this process can be found here, Improved Rusting Method for Iron Prints. The final product was pretty impressive, and looked more like something we dug out of the ground than something we had just 3D printed.

Peacock with one of Rob Neilson’s Teddy Box objects printed in the same filament that had not been rusted.


The two replicas together (in different light than the other photos).

Big thank you to our friend Beth Zinsli in the Wriston Art Center galleries for letting us scan one of the collection’s objects.

Studio Art Student Use of the Makerspace

We’ve had lots of interesting uses of our makerspace by Studio Art students for both senior exhibits and assignments. Here are some examples:

3D printed face connected to a long row of stairs in white

Quantified Actualization by Penn Ryan

Penn Ryan ’18 spent a lot of time in the makerspace meticulously designing  and 3D printing stairs for his piece, “Quantified Actualization”. The top part of this piece was designed using a 3D scan of his face, scanned and printed in the makerspace. In his artist statement, he describes this work as a commentary on fitness tracking,

…”This staircase is the combined product of 5 months of tracking. Fitness tracking is often an obsessive practice. Quantifying one’s accomplishments gives someone a feeling of control over their body. Users feel that technology can give them insights into how well they are taking care of their body and therefore meeting their goals. These goals are often initially physical but become mental and occupational and all encompassing. Whether or not one is striving for improvement and accomplishing it becomes a moral judgement. Self-actualization is the ultimate goal.”

More photos, and a complete artist statement can be found in the 2018 Senior Exhibit Gallery.

The Lost Man’s Fortune by Alison Smith

Alison Smith ’17 created an installation that spread across the exterior of the Wriston Art Center and inside the senior gallery exhibit. Alison used vinyl decals to create 8-bit video game inspired art scenes, as well as used the Silhouette cutter to create paper items and treasures, also inspired by video games. Her statement explains, “this installation gives physical forms to video game objects and environments in order to change the way we interact with them through the completion of a real-life, video game inspired quest.”

More photos of installation of The Lost Man’s Fortune can be found in the 2017 Senior Exhibit Gallery.
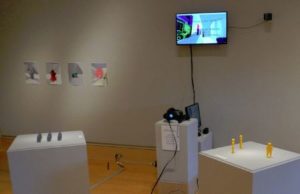
Installation View of Mystery Ocean by Noah Gunther

Noah Gunther ’17 used the makerspace to 3D print objects for both his junior show and senior show. In both, he created virtual worlds, and brought the virtual to physical using the 3D printers. For his senior show, he integrated a virtual reality headset to let the viewer further immerse themselves in the world he created. We asked Noah to tell us a little about using 3D printers as an artist- here’s what he had to say,

“…I’ve been interested in the intersection of what we think of as “real life” and the world of computer simulation for a long time. Having access to 3D printers has been an excellent way for me to explore this connection — I build 3D models on the computer, which I then add to a computer simulation where a user can virtually interact with them. I then also 3d print the models in the same colors I display the virtual models, allowing for a direct connection between the virtual objects and the 3D printed ones. Being able to 3D print these items allows me to explore the connection between virtual and real interaction in a way I otherwise wouldn’t be able to!”
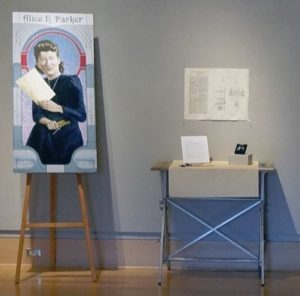
Alice Parker painting and installation by Aedan Gardill

Innovating a Legacy: Alice Parker by Aedan Gardill

Aedan R. Gardill ’18 painted a series of African American women inventors and innovators and created representational installations to accompany each painting. For Alice Parker, Aedan used the Silhouette cutter to create a vinyl display to represent her contributions to modern thermostats. He describes his series of paintings and installations as, “Sharing the stories of these women and increasing the visual representation of non-male, non-white scientists is a step forward to changing the negative cultural perspective of women in the sciences.”

More selections from the installation, Innovating a Legacy can be found in the 2018 Senior Exhibit Gallery.

Installation and paintings by Nina Sultan

Nina Sultan ’17 included interviews by portrait subjects with her paintings on display for her senior show. The interviews were played on iPads on loan from the makerspace. In her artist statement, Nina describes her works as, “Inspired by people from the Appleton community, through painting, photography, and audio documentation, the work seeks to create thoughtful narratives to unmask, appreciate, and better understand our personal connections on a deeper level.”

More photos of the installation can be found in the 2017 Senior Exhibit Gallery.

Speaking of these many student shows in the Wriston Galleries, gallery curators uses the makerspace’s Silhouette Cameo electronic cutter to create titles for their exhibits. It saves a great deal of money compared to requesting to have them made by an outside sign shop.
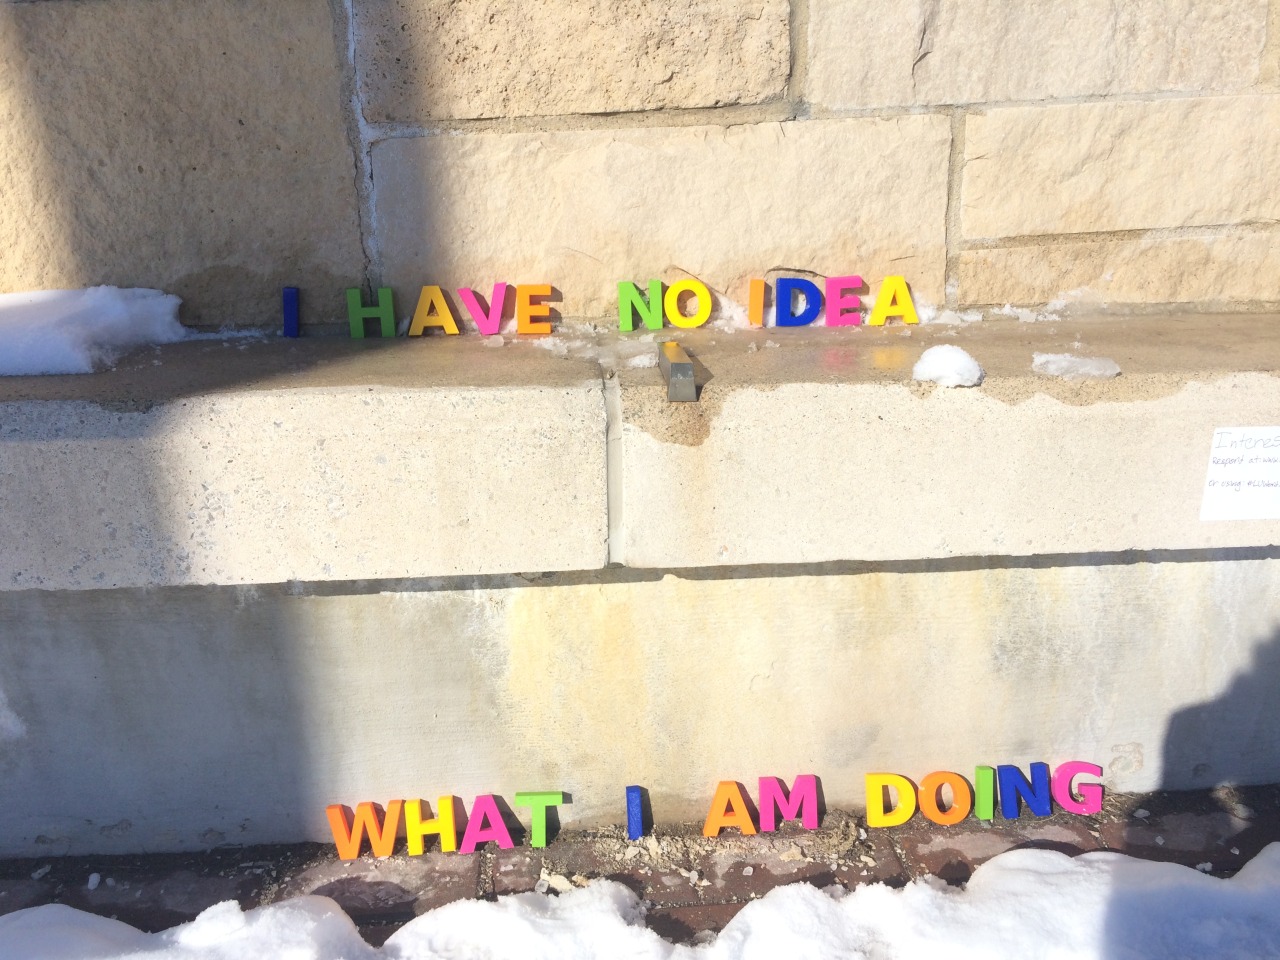
Word Art by Sara Morrison

Many other students have used the makerspace tools and equipment for projects related to art course assignments. Here are just a few:

Sara Morrison ’18 created a series of word art that she displayed around campus for her New Media in Art assignment. She used the 3D printer and electronic cutter to create letters from PLA filament and vinyl.

Sara encouraged members of the Lawrence University community to take photos of the word art (as she left it, and as it had been changed by others) and post them to her Tumblr page, LU Word Art.
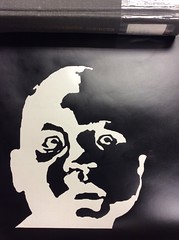
Stencil by Malcolm Lunn-Craft

Malcolm Lunn-Craft ’17 used the electronic cutter to create stencils for his painting class. The adhesive vinyl helped with his assignment medium of spray paint.

While not created in the makerspace, Malcolm’s powerful photographs from his senior exhibit are available to view in the  2017 Senior Exhibit Gallery (content warning: visual allusion to violence).

See more uses of the makerspace by Studio Art students and faculty on our Makerspace Assignments at LU page, as well as on our Instagram and Twitter.