By Wenchao Liu
When I visiting the Phoenix area this fall, I had the opportunity to engage in a holiday tradition—making gingerbread houses. One of the steps of making gingerbread houses is to cut out various pieces from the dough. Since I was making six houses, I thought that it would be so much easier if I could just 3D print the molds. That way, I wouldn’t need to cut the dough anymore; I could just press the molds against the dough.
The first step was to sketch different parts of the house. It was not a difficult challenge, but one of the things I had to keep in mind was about how the 3D prints should look like. For instance, it’d not be possible to create a mold with windows, because the windows would need to be somehow connected to the door frame. Thus, I sketched the windows separately.
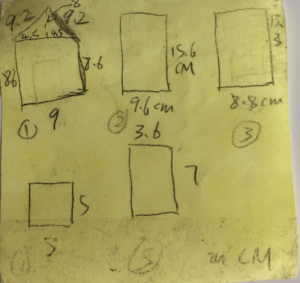
Functionality > Beauty
After I designed the 3D prints, I used Tinkercad to model them. Most of the shapes are simply rectangles, so I used the Cube shape from Basic Shapes and simply changed the sides to 4. After that, I decreased the values of Wall Thickness, Bevel, and Bevel Segments to their corresponding minimum values. Since some of the shapes are quite big, I put some small ones inside big ones, so I could print them out all at once.
Using the Tube Shape
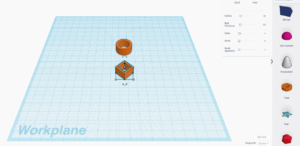
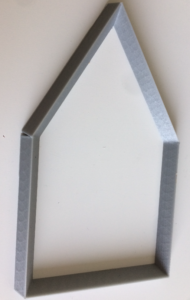
The real challenging part was modeling the main door of the house. As you can see from my rough design sketch, it wasn’t a usual shape. Thus, I created a triangle in a similar fashion using the Cube shape, but this time I changed the sides to 3 instead of 4, and laid it on top of a rectangle. The way I got ride of the line in the middle of the house was through the use of the “Hole” feature—I simply put a big box to cover the line and made it “Hole.”

Using “Hole”
Well, when I actually printed out one piece, it was such a failure! One thing that went wrong was the roof of the house wasn’t printed out, for whatever reason. The second thing was that the wall was too thin that it might be too weak to cut through even dough. The third thing was that the wall was too short that it might get buried in the dough. Overall, the structure is like me, an 80-pound man.

What a Joke
When I was in agony, Angela showed up at the right time, and I complained to her. She suggested that I look for online resources. She also drew me a sketch that I didn’t understand at all, but it was an inspiration. I drove back to the Chicago area that day with tears in my eyes.
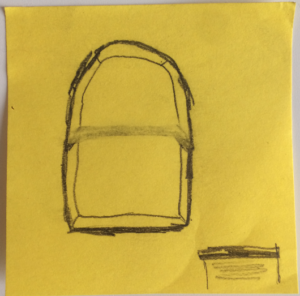
Angela’s Inspirational Sketch
When I got back home, I started working on it again. Per her instructions, I first searched on Thingiverse and found a few designs. By modifying one of the designs, I got a complete set of the shapes I wanted. It took me only about half an hour!
Great Artists Steal
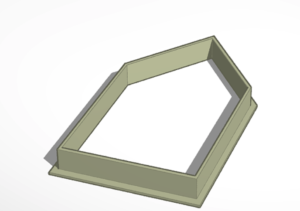
However, the thickness of the wall is constant, but I wanted it sharply shaped. This so-called roof shape got my attention; it could be a good shape to use! I put together four pieces of roofs of the same length to form a square. Grouping the four pieces and using the square as a template, I could easily create the rectangles I wanted. Creating the big piece was a bit more challenging, especially the top part, because the two roofs had to come together at the correct angle. I had to open my kindergarten math book and figure out the correct angle for that.
Math Is Cool
In the end, I successfully created the molds for making gingerbread houses. When I was actually printing out the pieces, I used two 3D printers simultaneously, because I was on a time budget. That’s the tip of the day: use multiple printers to speed up the process!
One last thing I want to mention is food safety. Since the molds are only intended to contact food for a very short period of time, food safety shouldn’t be an issue. However, it might not be wise to use 3D printed cups or containers, because their food safety hasn’t been studies yet.
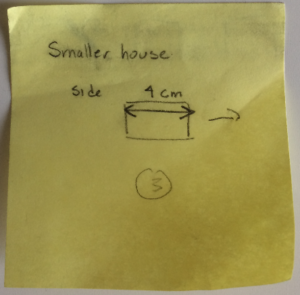
Smaller ones were very weak, so I didn’t want to write about them.