Category Archives: Assignments

Studio Art Student Use of the Makerspace

We’ve had lots of interesting uses of our makerspace by Studio Art students for both senior exhibits and assignments. Here are some examples:

3D printed face connected to a long row of stairs in white

Quantified Actualization by Penn Ryan

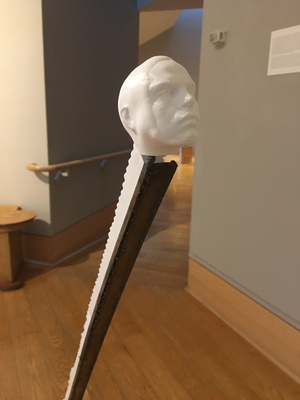
Penn Ryan ’18 spent a lot of time in the makerspace meticulously designing  and 3D printing stairs for his piece, “Quantified Actualization”. The top part of this piece was designed using a 3D scan of his face, scanned and printed in the makerspace. In his artist statement, he describes this work as a commentary on fitness tracking,

…”This staircase is the combined product of 5 months of tracking. Fitness tracking is often an obsessive practice. Quantifying one’s accomplishments gives someone a feeling of control over their body. Users feel that technology can give them insights into how well they are taking care of their body and therefore meeting their goals. These goals are often initially physical but become mental and occupational and all encompassing. Whether or not one is striving for improvement and accomplishing it becomes a moral judgement. Self-actualization is the ultimate goal.”

More photos, and a complete artist statement can be found in the 2018 Senior Exhibit Gallery.

The Lost Man’s Fortune by Alison Smith

Alison Smith ’17 created an installation that spread across the exterior of the Wriston Art Center and inside the senior gallery exhibit. Alison used vinyl decals to create 8-bit video game inspired art scenes, as well as used the Silhouette cutter to create paper items and treasures, also inspired by video games. Her statement explains, “this installation gives physical forms to video game objects and environments in order to change the way we interact with them through the completion of a real-life, video game inspired quest.”

More photos of installation of The Lost Man’s Fortune can be found in the 2017 Senior Exhibit Gallery.

Installation View of Mystery Ocean by Noah Gunther

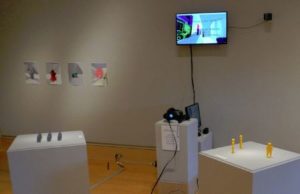
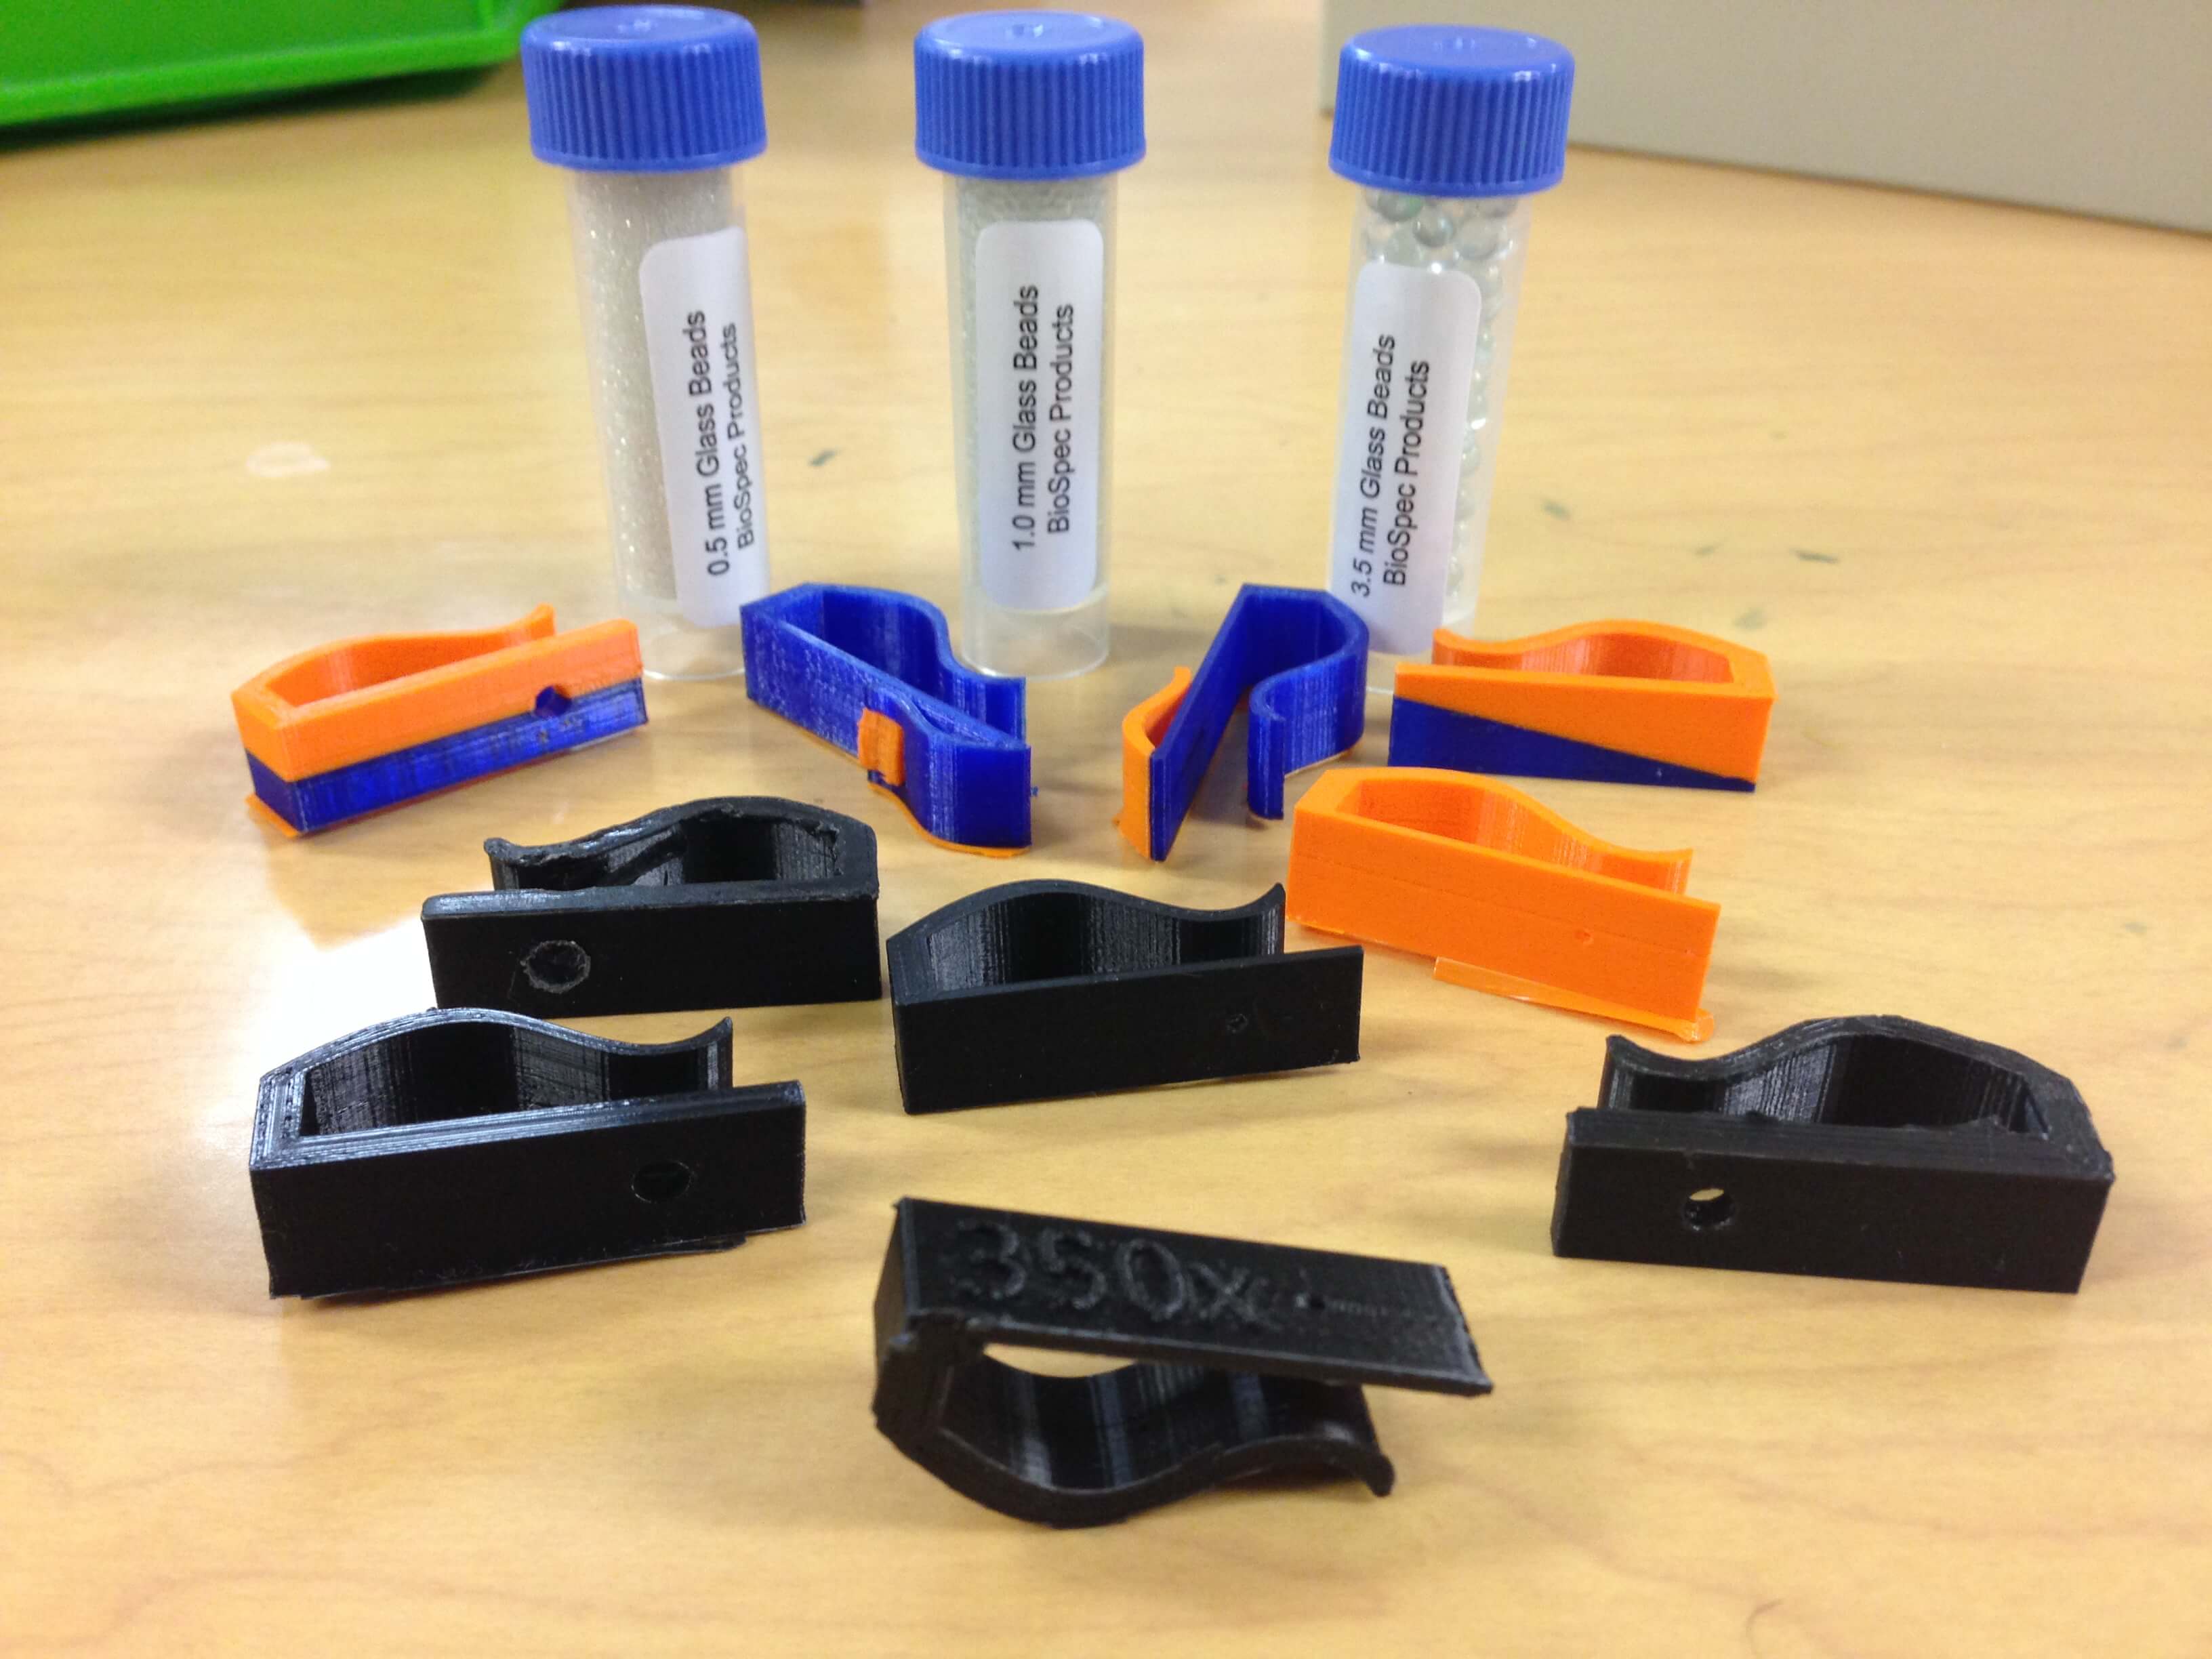
Noah Gunther ’17 used the makerspace to 3D print objects for both his junior show and senior show. In both, he created virtual worlds, and brought the virtual to physical using the 3D printers. For his senior show, he integrated a virtual reality headset to let the viewer further immerse themselves in the world he created. We asked Noah to tell us a little about using 3D printers as an artist- here’s what he had to say,

“…I’ve been interested in the intersection of what we think of as “real life” and the world of computer simulation for a long time. Having access to 3D printers has been an excellent way for me to explore this connection — I build 3D models on the computer, which I then add to a computer simulation where a user can virtually interact with them. I then also 3d print the models in the same colors I display the virtual models, allowing for a direct connection between the virtual objects and the 3D printed ones. Being able to 3D print these items allows me to explore the connection between virtual and real interaction in a way I otherwise wouldn’t be able to!”

Alice Parker painting and installation by Aedan Gardill

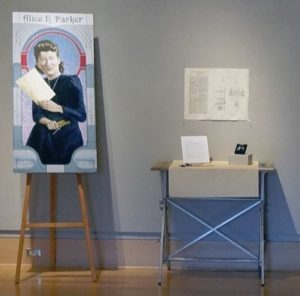
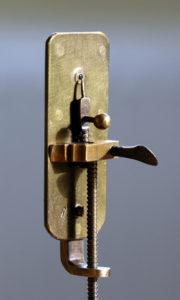
Innovating a Legacy: Alice Parker by Aedan Gardill

Aedan R. Gardill ’18 painted a series of African American women inventors and innovators and created representational installations to accompany each painting. For Alice Parker, Aedan used the Silhouette cutter to create a vinyl display to represent her contributions to modern thermostats. He describes his series of paintings and installations as, “Sharing the stories of these women and increasing the visual representation of non-male, non-white scientists is a step forward to changing the negative cultural perspective of women in the sciences.”

More selections from the installation, Innovating a Legacy can be found in the 2018 Senior Exhibit Gallery.

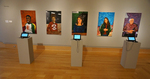
Installation and paintings by Nina Sultan

Nina Sultan ’17 included interviews by portrait subjects with her paintings on display for her senior show. The interviews were played on iPads on loan from the makerspace. In her artist statement, Nina describes her works as, “Inspired by people from the Appleton community, through painting, photography, and audio documentation, the work seeks to create thoughtful narratives to unmask, appreciate, and better understand our personal connections on a deeper level.”

More photos of the installation can be found in the 2017 Senior Exhibit Gallery.

Speaking of these many student shows in the Wriston Galleries, gallery curators uses the makerspace’s Silhouette Cameo electronic cutter to create titles for their exhibits. It saves a great deal of money compared to requesting to have them made by an outside sign shop.

Word Art by Sara Morrison

Many other students have used the makerspace tools and equipment for projects related to art course assignments. Here are just a few:

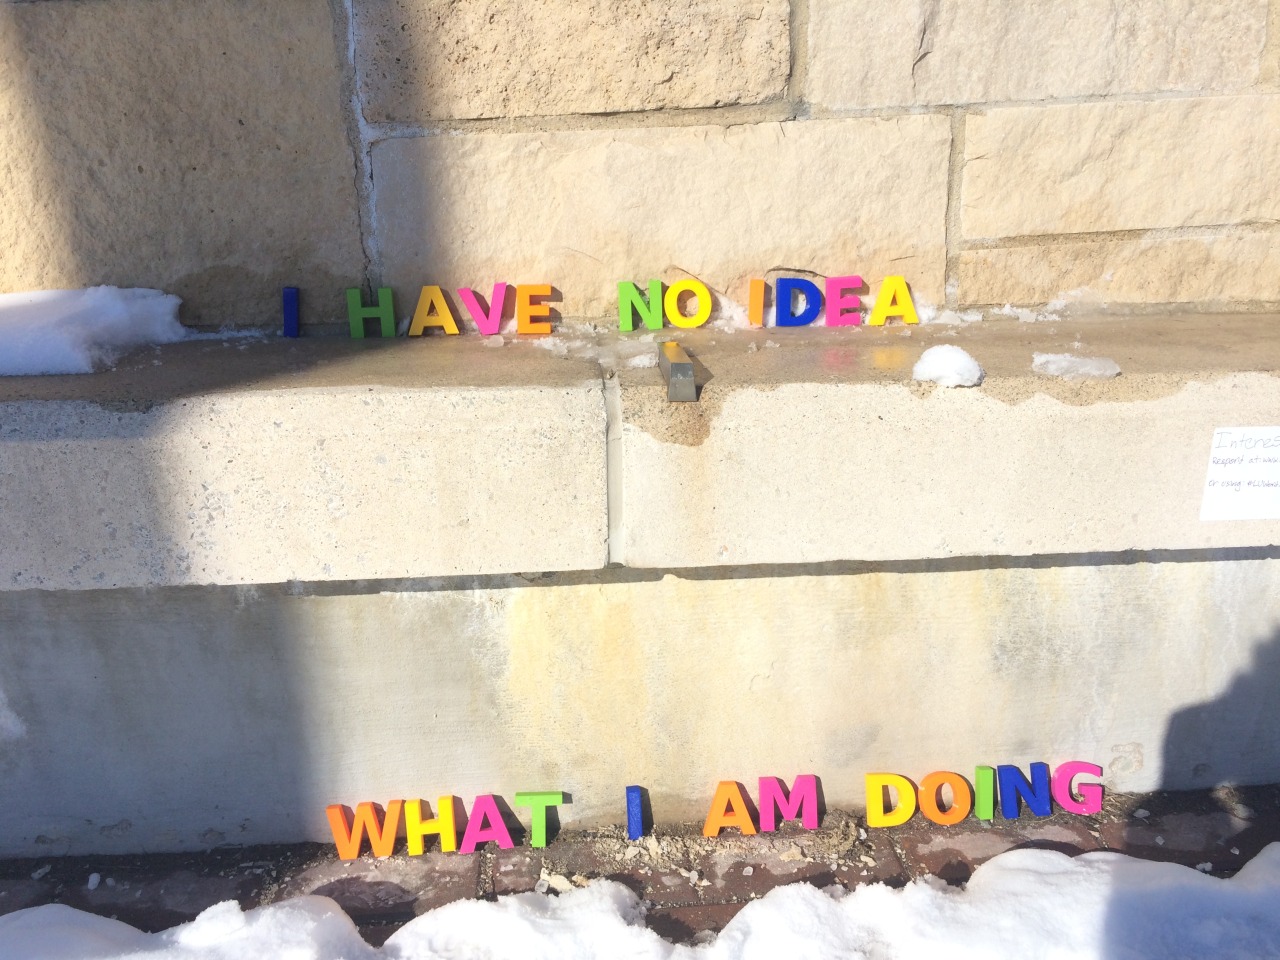
Sara Morrison ’18 created a series of word art that she displayed around campus for her New Media in Art assignment. She used the 3D printer and electronic cutter to create letters from PLA filament and vinyl.

Sara encouraged members of the Lawrence University community to take photos of the word art (as she left it, and as it had been changed by others) and post them to her Tumblr page, LU Word Art.

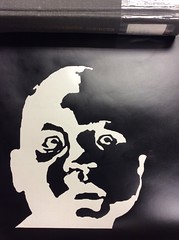
Stencil by Malcolm Lunn-Craft

Malcolm Lunn-Craft ’17 used the electronic cutter to create stencils for his painting class. The adhesive vinyl helped with his assignment medium of spray paint.

While not created in the makerspace, Malcolm’s powerful photographs from his senior exhibit are available to view in the  2017 Senior Exhibit Gallery (content warning: visual allusion to violence).

See more uses of the makerspace by Studio Art students and faculty on our Makerspace Assignments at LU page, as well as on our Instagram and Twitter.

Wall-Following RC Car

By Wenchao Liu

When I was a junior, I decided that I’d work on autonomous vehicles after graduation. However, as an undergraduate, I’d not be able to produce a research paper in the field. Thus, I dedicated my senior experience to building a self-driving RC car, which was within my reach. Calling it self-driving might be a stretch, since the only capability for the car was wall-following. However, the project really took me a lot of time and energy.

The first step was to build a platform where the electronics could stand. There were a lot of electronics that needed to be on the RC car, and they couldn’t just be taped on the top. Thus, I paid someone to use a laser cutter to cut out different parts of the platform from two pieces of plastics. After assembly, the electronics could safely be placed on top of the RC car. The Makerspace doesn’t have a laser cutter, but Angela purchased one on back order, so we’ll see when we will get it!

The second step was to put the electronics securely on the platform. That process requires a lot of screws, standoffs and even fasteners! In addition, I had to solder a lot of circuits and headers in the Makerspace. There are many useful communal tools in the Makerspace, such as a soldering iron, screw drivers and various types of glue! On top of that, Angela, who is in charge of the Makerspace, is also helpful and wiling to buy almost whatever tools you want! She also has great ears to listen to your complaints when things go south!

The final step was software. I used ROS on Ubuntu to analyze the data from the Lidar, and to send commands from the computer to the micro-controller. The computer uses the Lidar data to estimate the distance between the car and the wall. If the car is too far away from the desired distance, the computer tells the micro-controller to steer closer, and vice versa. How much should the car steer? Well, that is handled by a PID controller, which takes the off-set from the desired distance and outputs the steering angle.

Wenchao and his friend Sheila (not Angela)

In total, the project took me about half a year. I took a class on Arduino in the chemistry department in the spring term of my junior year (yes, chemistry!) and worked on the project through the following summer and fall. During the entire process, I spent quite some time in the Makerspace, complaining to Angela! When the project was finished, I gave a talk about it, and many people came, including Angela! Look at how much she aged after listening to all my complaints!

3D Printed Smartphone Microscopy

By: Harsimran Kalsi

3D printed smartphone microscopy housings and magnifying glass beads.

How did microscopy become a thing? A very brief history of microscopy.

The first microscope is largely credited to having been created by a Dutch man named Antonie Von Leeuwenhoek, during the 17th century (Howard Hughes Medical Institute). Leeuwenhoek utilized a relatively simple apparatus to discover and explore what he called, “animalcules.” His apparatus consisted primarily of a very precisely shaped glass bead, embedded into a handheld housing. Using this instrument, he explored many different mediums (e.g. pond water, blood) and discovered many different microbes (e.g. Daphnia, bacteria, red blood cells).

A replica of Leeuwenhoek’s microscope. Courtesy of Funsci.com

As time continued, more methods of microscopy have been developed and advanced. In modernity, we have crafted various advanced optical/light microscopes capable of viewing samples at 300x magnification. Other methods exist that allow us to analyze samples outside wavelengths of light suited for the human eye (e.g. infrared, ultraviolet). Methods such as scanning electron microscopy and transmission electron microscopy manipulate electrons to obtain highly detailed images of greater magnifications. These methods can magnify samples anywhere between 1,000x-30,000x (depending on the particular method).


Why study the microcosm?

Most life on earth is completely invisible to the human eye, without the aid of a microscope. Looking at the tree of life, one can see that most of it is microbial and that a small sliver/branch of it, actually constitutes what we can see. This vast, teeming, beautiful, and barely explored microcosm can often go overlooked every moment.

Though these microbes may go overlooked, that by no means implies that they have little affect on the way our world is. In fact, these microbes have a profound effect. Bacteria cover everything including our own skin. They also live within many organisms (including ourselves) and help us in several ways. However, many microbes can make us extremely sick and with the current state of increasing global antibiotic resistance, it is crucial that we understand more about these organisms to maintain our own well-being.

Types of 3D printed microscopy

Different methods of 3D printed microscopy have been developed over the past decade, however, the focus of this project will primarily be with one particular method. This method was developed by Pacific Northwest National Laboratories (PNNL) and is very similar to Leeuwenhoek’s first microscope, in a lot of ways. The method consists of 3D printing a housing that hold a glass bead of a specific diameter. The diameter of the spherical glass bead in turn determines the magnification that the microscope is capable of. This apparatus then slips over your smartphone camera and can be used to view certain things.

Benefits of 3D printed smartphone microscopy

The concept of 3D printed smartphone microscopy visualizes many benefits. 3D printed microscopy methods may be far more economically feasible than other microscopy methods. Many microscopes are not cheap, however, if a microscope could be composed primarily of one cheap material (e.g. PLA, ABS) and printed quickly through additive manufacturing techniques, one might be able to print many cheap but efficient microscopes (hence maximizing productivity). Furthermore, these microscopes may be easier to use and deploy in resource poor areas.

Method

In this project, I used standardized slides with microorganisms of a known type to test the efficiency of PNNL’s smartphone microscope design against that of a standardized light microscope (a Nikon Eclipse E100). The slides consisted of Zea mays, Rhodospirilium rubrum, Bacillus megaterium, and Micrococcus luteus. Efficiency was determined primarily by comparing the magnification, resolution, durability/ease of use, and overall clarity of the smartphone microscopes with the light microscope.

Two magnifications were tested with the smartphone microscope housings: 100x and 350x (with beads of 3.5 mm and 1.0 mm diameters respectively). Many beads provided by the equipment company were not perfectly spherical and had slight imperfections (e.g. small dents, cloudiness, smudges). In this project, the most spherical and clear beads were used and a 70% isopropyl alcohol solution was used to clean the beads before and after use to optimize image clarity. Latex gloves were also used to prevent finger oils and foreign contaminants that might be located on one’s hands from contacting the bead surface.

.Stl files for the housings were obtained from PNNL’s website and the bead holes were expanded post printing, as they were initially too small.

Results

The images and figures below were obtained through analysis of the slides. The smartphone microscope images generally appeared to be of considerably lower quality compared to the light microscope. Images taken with the smartphone microscope often had poor resolution and clarity (so much so that the Zea mays sample was unobservable with the smartphone microscope). This in part might be attributed to imperfections and detritus on the bead surface. On the other hand, the smartphone microscopes were capable of magnifying fairly well, however, the poor resolution and higher sensitivity of these microscopes made it harder to view clear images and control the instrument.

Lighting was also an influencing factor. At times, it was difficult to establish optimal lighting conditions for the smartphone microscope (in contrast to the light microscopes which have a fixed and adjustable light source). Often, imperfections or oil on the bead would lead to strange diffraction patterns of light that wouldn’t illuminate the sample very well.

It also proved an arduous task to insert beads into the housing. At first, the housing files proved too small to house the beads. I ended up expanding the holes within the housings by about 0.3 mm for the x100 magnification and about .1 mm for the x350 magnification. I later created a .stl file with an assay of housings with different sized holes to find the optimal size for each magnification.

100 smartphone

350 magnification smartphone

zea light microscope

bacillus light mirco

micrococcus light micro

Promising future modifications/designs

It seems that this version of the smartphone microscope can still be promising for future smartphone microscopy endeavors. If one finds a way to address just a couple of key issues, this technology could be very efficient. Perhaps, if one found a way to maintain consistent beads with little to no imperfections, it likely would improve the resolution and clarity of the microscope. Also, if someone found a way to optimize the process of embedding the bead into the housing without contaminating, dropping, or losing the bead, that would also make a big difference. Adjusting the print files to house the beads without further adjustment would also improve the overall process.

Recent advances in smartphone microscopy include a smartphone microscope apparatus created by the Centre for Nanoscale BioPhotonics: Arc Centre of Excellence, which is a 3D printed “clip on” that requires no bead whatsoever. The entire apparatus is 3D printed (preferably with black filament) and utilizes ambient light and camera flash to illuminate and magnify samples. More information about how it works can be found here. This method appears to be promising as well.

Acknowledgements

This project could not have been completed without the guidance of Angela Vanden Elzen. Additionally, crucial supplies were provided generously by Wayne and JoAnn of the Biology Stockroom. Thank you to Dr. Jodi Sedlock for allowing me to utilize her lab space. Special thanks also to Dr. Nancy Wall for providing the prepared slides and allowing me to use her lab space/microscope.

References

Howard Hughes Medical Institute. Seeing The Invisible: Van Leeuwenhoek’s First Glimpses Of The Microbial World. 2014, https://www.youtube.com/watch?v=ePnbkNVdPio. Accessed 30 May 2018.

“PNNL Smartphone Microscope – Available Technologies – PNNL”. Availabletechnologies.Pnnl.Gov, 2018, https://availabletechnologies.pnnl.gov/technology.asp?id=393. Accessed 30 May 2018.

Implications of Dual Color Printing on Virology

By: Harsimran Kalsi

What are viruses and why are they important?

Virology is a field of science that is principally concerned with studying viruses. Viruses are infective biological agents that only reproduce inside the cells of a living host. Viruses are too small to be observed through light microscopy, and typically consist of an intricate protein coat (also known as the “capsid”) which surrounds and contains a strand of nucleic acid (genetic material that encodes the info a virus needs to reproduce).

Viruses are important because they cause some of the most lethal diseases in the world. HIV, Ebola, Rabies, Smallpox, and Influenza are just a few of the deadliest viruses in history. The 1918 flu pandemic alone infected over 500 million people and claimed the lives of 3-5% of the world’s population at that time (“The 1918 Influenza Pandemic”). The pathogenicity of viruses isn’t always human specific either, many viruses can target certain species with particular ecological niches. Understanding how viruses function is crucial in combating these prolific pathogens. What’s more, to understand a virus’s functionality, one must understand its fundamental biochemical composition.

How does structure implicate function?

Viruses share many of the defining characteristics of life and even appear to be as alive as cells in some cases (such as the bacteriophage). However, because viruses cannot survive on their own (without a host) and because they have no self-sustaining methods of metabolism to procure and process energy, they are technically considered to be non-living entities.

Viruses are amazing for several reasons. One reason is because they are incredibly advanced works of natural nanotechnology. The complex protein structures that form the capsid and the receptors on the capsid, can bind with each other in interesting ways. An icosahedral virus structure for example (such as Rhinovirus) are composed of twenty equilateral triangular subunits that all geometrically fit together. Furthermore, a complex virus structure (such as a Bacteriophage) appears almost like a spider with various appendages.

Bacteriophage from fineartamerica.com

The Bacteriophage (also known as a “phage” is a good example of a virus whose structure directly implicates function, and whose behavior makes it seem almost alive. Bacteriophages will infect and replicate within Bacteria and Archaea specifically. Phages are incredibly diverse and can be found anywhere that bacteria are found. Phages will use their spider leg like appendages to attach to bacterial cells (“docking” at very specific receptors on the bacterial cell surface), then the phage “injects” its genetic information into the bacteria where it is incorporated and transcribed. The bacterial cell now translates the genetic information into more phages which are now located within the cell. As a result, the bacterial cell itself has become a factory that produces 100,000s of new phages, until it eventually explodes in an extravagant cellular display. These new phages then go on to continue this process known as a lytic cycle.

What if we could know more about how phages bind to receptors on the surface of bacterial cells? What if we knew the structure of the receptor proteins that the phage binds to? Could we perhaps design allosteric inhibitors that prevent phages from binding to more cells? What if we knew more about the structure of the phages delivery system of genetic information? Could we then use a similar method of targeted delivery with artificial therapies to certain cell types?

In comes 3D printing

The benefit to 3D printing virus structures is that it can promote a better understanding of how certain viruses function. This increased understanding can in turn lead to several future innovations.

Virus structures are biochemically determined, broadly speaking, through a process called x-ray crystallography and diffraction. This process allows scientists to visualize an electron density map of protein/virus structures, and thus, construct a computer model of the proteins. The electron density maps allow scientists to construct the amino acid sequence that is the backbone structure of the protein.

These computer models can then be formatted to be 3D printed in many ways. Different printers and materials will lead to different outcomes. Additionally, certain protein subunits or parts may be of interest and can be printed without the rest of the protein structure. As a result, one can highlight things like active sites, receptor binding domains, and cofactors within active sites.

Recently, in collaboration with Dr. Dave Hall and Angela Vanden Elzen, I was able to 3D print a dual color virus structure for Human Papillomavirus (HPV) and Adenovirus. Dual color printing is a unique kind of 3d printing where two colors are incorporated together into a single print. Based on my research, this was the first time that a virus structure was 3d printed in two colors using a 3d printer, under the cost of $100,000. The files were posted onto Thingiverse for the rest of the community to utilize, access them here.

Method of Dual Color Printing Viruses

Initially, to print dual color virus structures, I tried to create my own stl.’s of viruses using a process similar to Dr. Hall’s (as he describes here https://www.thingiverse.com/thing:43144). The key difference, however, was that I was trying to modify the virus structure in Pymol so that different protein subunits could be differentiated from one another. The differentiation at first was through coloring, and the eventual goal was to differentiate them as .stl files. The reasoning seemed pretty straightforward, if we could code into Pymol and differentiate different protein units by color, then theoretically there must be some way we can also code an .stl differentiation into the subunits we colored.

This proved to be a relatively arduous task. Various issues arose as I tried to implement this approach. As a result, I decided to temporarily shift my focus to printing viruses a little more straightforward.

To print the dual color virus structure, I obtained the stl. versions of the viruses from Dr. Hall’s Thingiverse profile (found here). I then loaded the files into a program called, Meshmixer.


Within Meshmixer, I was able to mark all of the protrusions located on HPV and Adenovirus’s capids, such that they were all separate .stls. Meanwhile, the non-protrusion or “base” part of the capsid remained its own .stl.


I used the “Plane Cut” tool in tandem with the “Separate Shells” tool, to differentiate each protrusion and eventually combine each into one cohesive .stl. At this point, I uploaded the combined protrusions .stl to Cura along with the virus base .stl.


I then selected (right clicked) the protrusions .stl and specified that it should be printed with the second extruder. After this, selected both files, right clicked, and merged the files.


Acknowledgements

This project could not have been completed without the assistance and mentorship of Angela Vanden Elzen and Dr. Dave Hall.

References:

“The 1918 Influenza Pandemic”. Virus.Stanford.Edu, 2018, https://virus.stanford.edu/uda/. Accessed 31 May 2018.