On the evening of March 9th, I attended a performance in Esch-Hurvis. I sat down in the front row with my friend Tahnee, and she started talking to me about 3D printing. At the time, it was an abstract concept in my mind. I didn’t even know what a 3D printer looked like. We talked briefly about setting up a 3D printing tutorial, and then the show started.
It could have ended there. So many conversations give birth to ideas that are easy to discuss and easy enough to see through, but don’t turn into a realization of those ideas. It was tenth week, but Tahnee sent the emails and set up the meetings and we made a rough list of things we wanted learn. By the end of March, ART390: TU-3D PRINTING & DESIGN had come to life.
Like I said, 3D printing was an abstract concept to me. The term is self-descriptive, but I couldn’t wrap my mind around a machine that makes any object you want emerge from its inner workings. At the very least, I thought that I’d have to learn how to code for this tutorial.
As I’ve found with most things in life, 3D printing is easier than I expected. Thingiverse is one of the many websites where makers share downloadable files of objects they’ve designed. Once a file is saved, you open it in a program called Cura, scale the object to your liking, load the 3D printer with filament in the color you want, and print. No computer science skills necessary.
Even though it is a relatively new technology, there are a lot of talented artists in the 3D printing world. On Thingiverse, you can search for anything from cookie cutters to models of internal organs. Tahnee and I both love elephants, so that is what we chose to print for our first assignment.
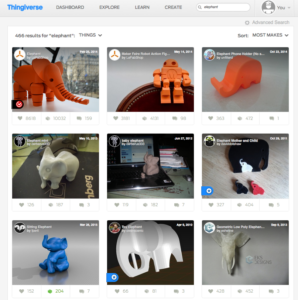
The blue one on the bottom left was the winner.
I am a huge space nerd. As soon as I’d mastered the basics 3D printing, my first impulse was to print an astronaut helmet and a replica of Saturn and a model of the NASA logo and a plaque that says “I Need My Space.” I had no idea that 3D printing could be used for so much more than making personalized dorm decorations.
As part of this tutorial, Tahnee and I did research on 3D printing for the History and Education pages of this blog. I found online communities and news sites dedicated to 3D printing. I learned that it is being used to create new shapes of pasta, models of textbook images for blind students, Game of Thrones props, prosthetic limbs and organs, fake sea turtle eggs to track poachers, and more. It’s cool to imagine what 3D printing will accomplish as it becomes more mainstream. And ironically, the only coding I did this term was when I was editing those blog pages.
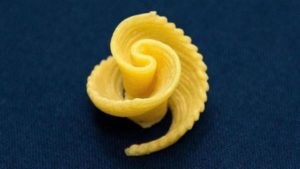
Italian pasta creator Barilla made this shape on a 3D printer.
Our second assignment was to download a file and modify it using a program called Tinkercad. At first, using Tinkercad feels silly. It’s designed for makers of all ages, so the interface is user-friendly to the point of rainbow colors and extensive tutorials. That being said, once I got past (skipped) the tutorials, I realized that Tinkercad is more than just a K-6 educational website.
Tinkercad is a website where makers design 3D printable objects out of geometric shapes, numbers, and letters.
In the spirit of creating something useful, I downloaded the object file for an iPhone stand from Thingiverse and used to Tinkercad to add the words “¿Diga?” and “¡Ciao!”, which are a way to say “Hello” and “Good-bye” on the phone in Spanish. I’m an undeclared Spanish major, so I thought it was a funny idea.
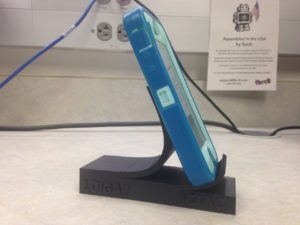
My custom-made phone stand.
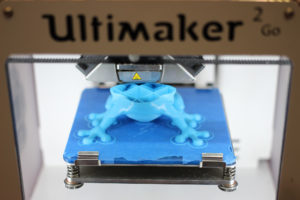
Just like most things that are easy at first, 3D printing has some hidden challenges. First of all, it takes a long time. 3D printers construct objects layer by layer with a very thin film of plastic. Phanty, our 3cm tall elephant from the first assignment, took 3 hours to print. My phone stand took 12 hours.
3D printers print objects layer by layer. Maurizio Pesce | Flickr
Since 3D printing is a new technology, a lot of troubleshooting is also involved. The print head gets clogged easily, and you have to go through a process called the Atomic Method to unclog it. The built-in fans on the printer adjust automatically and will blow the filament out of place. Sometimes, the object will start becoming lopsided and collapse.
This means that you have to start over a lot. It means that a 3-hour job could really be an 8-hour job. And it means that you have to waste a lot of filament. The filament we use is PLA plastic, which is biodegradable. However, degradation in a landfill can take years, so it did give me a little bit of dissonance to read about how 3D printing is being used to create a line of shoes made of only plastic marine waste, while simultaneously adding to that waste.
For me, the pros still outweigh the cons. Tahnee and I decided to create a miniature makerspace for our final project. It took several weeks and an entire spool of transparent filament, but the satisfaction I felt when I saw everything together was worth the hours it took.
My proudest achievement this term was the 3D printer that I made for this project. My first attempt failed because the fans blew the filament out of place, and the second failed because I did not make sure that the printer created support structures for the build plate in the middle of my design. Since the 3D printing process is layer by layer, those structures are needed so that the 3D printer does not try to print in thin air.
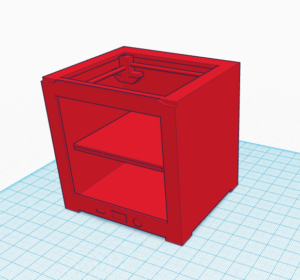
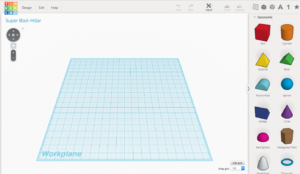
The Tinkercad workplane design.
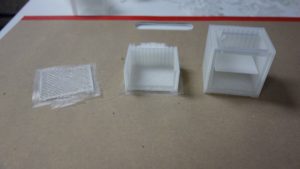
My two failed and one successful attempts.
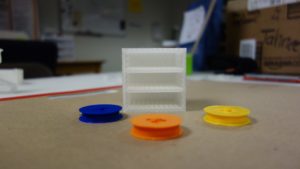
I also designed a shelf and some extra filament rolls.
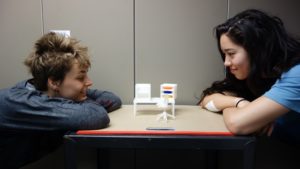
Our mini makerspace.
My 3D printing tutorial has improved my work ethic. It has made me feel a little attached to a machine that I did not even know existed on this campus ten weeks ago. But mostly, 3D printing has changed the way I think about the connection between the real world and technology, and I feel smarter because of it. A million thank-yous to Angela for taking the time to teach Tahnee and me about this new art form.