Author Archives: Wenchao Liu

From Wall-Following to Full Autonomy

By Wenchao Liu

When I was a happy college student at Lawrence, I made a wall-following RC car. The project was truly a blessing, because it led me to many amazing people such as Prof. Stoneking and Angela. My theoretical-physicist-turned-computer-scientist professor, Prof. Gregg, helped me a lot during the process as well. My presentation day was one of my proudest days, as I was showing a room of my professors that I was actually not that dumb. 

It’s been a year since that presentation day, and I am still living in the past. Currently I am building the second version of the car, following instructions on f1tenth.org. The second version has quite a few improvements over the first one, and I have learned quite a lot so far. This post is about such improvements and what I plan to do in the future. It’s like the project proposal I gave in college, which wasn’t fully executed.

The most obvious improvement is a mechanical one. The previous build has two layers of plastics, which are connected also by plastics. As a result, the build is not rugged and glue was frequently applied. The new build has only one layer of plastics, and it’s mounted on a lower level than the base layer of the old build.
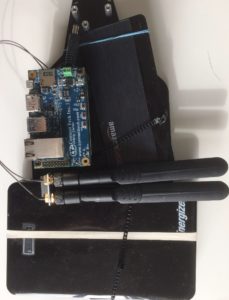
Just One Layer!

The electrical improvement is less obvious, but still visible. I had to changed the brushed motor to a brushless one, and to buy a VESC to control that. Thus, a Teensy micro-controller is not longer needed, as the computer can just control the VESC directly. The second build also uses an Orbitty carrier board, which has a smaller form factor than the previous one. Form factor; what a jargon word!
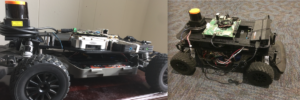
Can you tell which one is the current one?

The software improvement is not even visible as all, but it’s always been most frustrating. Although the only functionality I had with the previous build was wall-following, the car could actually do a lot more. The main functionalities I am trying to implement now are mapping with Lidar, localizing the car, generating and following waypoints. That’s where the f1tenth.org stops, but I won’t stop learning for a long time!

Stay tuned!

How to Create Gingerbread House Molds

By Wenchao Liu

When I visiting the Phoenix area this fall, I had the opportunity to engage in a holiday tradition—making gingerbread houses. One of the steps of making gingerbread houses is to cut out various pieces from the dough. Since I was making six houses, I thought that it would be so much easier if I could just 3D print the molds. That way, I wouldn’t need to cut the dough anymore; I could just press the molds against the dough.

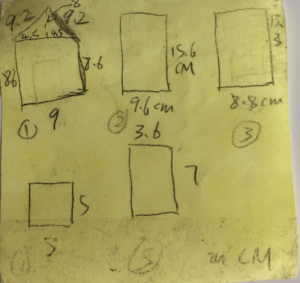
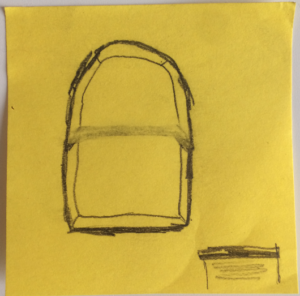
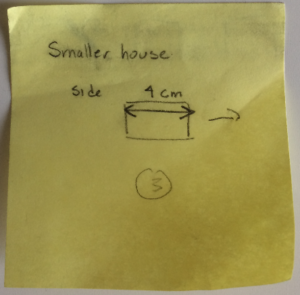
The first step was to sketch different parts of the house. It was not a difficult challenge, but one of the things I had to keep in mind was about how the 3D prints should look like. For instance, it’d not be possible to create a mold with windows, because the windows would need to be somehow connected to the door frame. Thus, I sketched the windows separately.

Functionality > Beauty

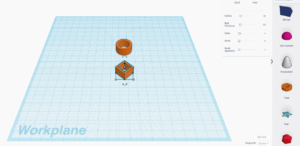
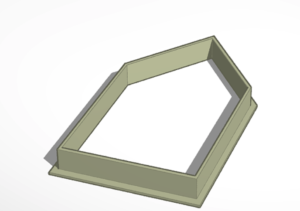
After I designed the 3D prints, I used Tinkercad to model them. Most of the shapes are simply rectangles, so I used the Cube shape from Basic Shapes and simply changed the sides to 4. After that, I decreased the values of Wall Thickness, Bevel, and Bevel Segments to their corresponding minimum values. Since some of the shapes are quite big, I put some small ones inside big ones, so I could print them out all at once.

Using the Tube Shape

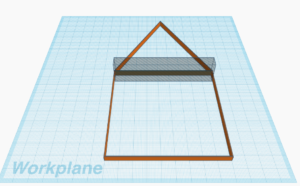
The real challenging part was modeling the main door of the house. As you can see from my rough design sketch, it wasn’t a usual shape. Thus, I created a triangle in a similar fashion using the Cube shape, but this time I changed the sides to 3 instead of 4, and laid it on top of a rectangle. The way I got ride of the line in the middle of the house was through the use of the “Hole” feature—I simply put a big box to cover the line and made it “Hole.”

Using “Hole”

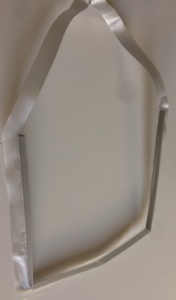
Well, when I actually printed out one piece, it was such a failure! One thing that went wrong was the roof of the house wasn’t printed out, for whatever reason. The second thing was that the wall was too thin that it might be too weak to cut through even dough. The third thing was that the wall was too short that it might get buried in the dough. Overall, the structure is like me, an 80-pound man.

What a Joke

When I was in agony, Angela showed up at the right time, and I complained to her. She suggested that I look for online resources. She also drew me a sketch that I didn’t understand at all, but it was an inspiration. I drove back to the Chicago area that day with tears in my eyes.

Angela’s Inspirational Sketch

When I got back home, I started working on it again. Per her instructions, I first searched on Thingiverse and found a few designs. By modifying one of the designs, I got a complete set of the shapes I wanted. It took me only about half an hour!

Great Artists Steal

However, the thickness of the wall is constant, but I wanted it sharply shaped. This so-called roof shape got my attention; it could be a good shape to use! I put together four pieces of roofs of the same length to form a square. Grouping the four pieces and using the square as a template, I could easily create the rectangles I wanted. Creating the big piece was a bit more challenging, especially the top part, because the two roofs had to come together at the correct angle. I had to open my kindergarten math book and figure out the correct angle for that.

Math Is Cool

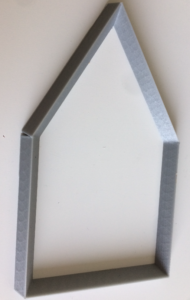
In the end, I successfully created the molds for making gingerbread houses. When I was actually printing out the pieces, I used two 3D printers simultaneously, because I was on a time budget. That’s the tip of the day: use multiple printers to speed up the process!

One last thing I want to mention is food safety. Since the molds are only intended to contact food for a very short period of time, food safety shouldn’t be an issue. However, it might not be wise to use 3D printed cups or containers, because their food safety hasn’t been studies yet.

Smaller ones were very weak, so I didn’t want to write about them.

My Experience With Laser Cutting

By Wenchao Liu

In anticipation of the laser cutter our Makerspace is going to purchase, I decided to write an introductory article about laser cutters. This article is about what laser cutters can or can’t do, when you should use one, and how you can get your hands on one in Appleton.

The first thing you should know about laser cutters is what they can or can’t do. They differ from 3D printers, because they generally can’t generate 3D shapes. However, as the name suggests, they can either cut through or engrave on a variety of materials, including plastics and glass.

When do you choose to use a laser cutter versus a 3D printer? We know that laser cutters can’t generate 3D shapes, but what if you want to create a piece of flat plastic chassis? You can theoretically use either one. That said, laser cutters generally have a bigger bed and takes a lot less time than 3D printers. You just need to buy the plastics yourself!

Where can you find laser cutters in Appleton while waiting for the one Angela promised to get us? There’s one in the Appleton Makerspace, whose website is https://appletonmakerspace.org, and one in the Fox Valley Technical College, whose website is https://www.fvtc.edu/employers/fab-labs. In addition, there are other services you can pay in Appleton. 

Maybe we can only wait until Angela puts one in the library. The reason why it’s been taking so long is that laser cutters generate a lot of heat, so as a result they require special ventilation equipment. We are getting a Glowforge, but their ventilation equipment—Air Filter won’t be available until April 2019. We can only wait!

Wall-Following RC Car

By Wenchao Liu

When I was a junior, I decided that I’d work on autonomous vehicles after graduation. However, as an undergraduate, I’d not be able to produce a research paper in the field. Thus, I dedicated my senior experience to building a self-driving RC car, which was within my reach. Calling it self-driving might be a stretch, since the only capability for the car was wall-following. However, the project really took me a lot of time and energy.

The first step was to build a platform where the electronics could stand. There were a lot of electronics that needed to be on the RC car, and they couldn’t just be taped on the top. Thus, I paid someone to use a laser cutter to cut out different parts of the platform from two pieces of plastics. After assembly, the electronics could safely be placed on top of the RC car. The Makerspace doesn’t have a laser cutter, but Angela purchased one on back order, so we’ll see when we will get it!

The second step was to put the electronics securely on the platform. That process requires a lot of screws, standoffs and even fasteners! In addition, I had to solder a lot of circuits and headers in the Makerspace. There are many useful communal tools in the Makerspace, such as a soldering iron, screw drivers and various types of glue! On top of that, Angela, who is in charge of the Makerspace, is also helpful and wiling to buy almost whatever tools you want! She also has great ears to listen to your complaints when things go south!

The final step was software. I used ROS on Ubuntu to analyze the data from the Lidar, and to send commands from the computer to the micro-controller. The computer uses the Lidar data to estimate the distance between the car and the wall. If the car is too far away from the desired distance, the computer tells the micro-controller to steer closer, and vice versa. How much should the car steer? Well, that is handled by a PID controller, which takes the off-set from the desired distance and outputs the steering angle.

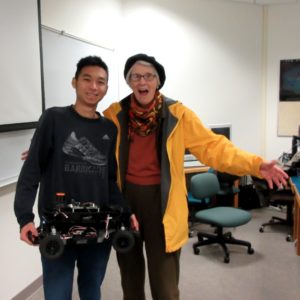
Wenchao and his friend Sheila (not Angela)

In total, the project took me about half a year. I took a class on Arduino in the chemistry department in the spring term of my junior year (yes, chemistry!) and worked on the project through the following summer and fall. During the entire process, I spent quite some time in the Makerspace, complaining to Angela! When the project was finished, I gave a talk about it, and many people came, including Angela! Look at how much she aged after listening to all my complaints!