Did you know that if you log in to your library account in Library OneSearch, a whole selection of options are made available?! Logging in allows you to see additional materials in the OneSearch and Course Reserves tabs, and do a bunch of cool stuff from your library account. One of these cool things is the e-Shelf feature.
The e-Shelf feature allows you to save items and go back to them later rather than printing screenshots or taking pictures with your phone. It works with items we have in the library like books and videos as well as with articles found in the OneSearch tab.
Unsure of how to add items to your e-Shelf? Here are some photos to help.
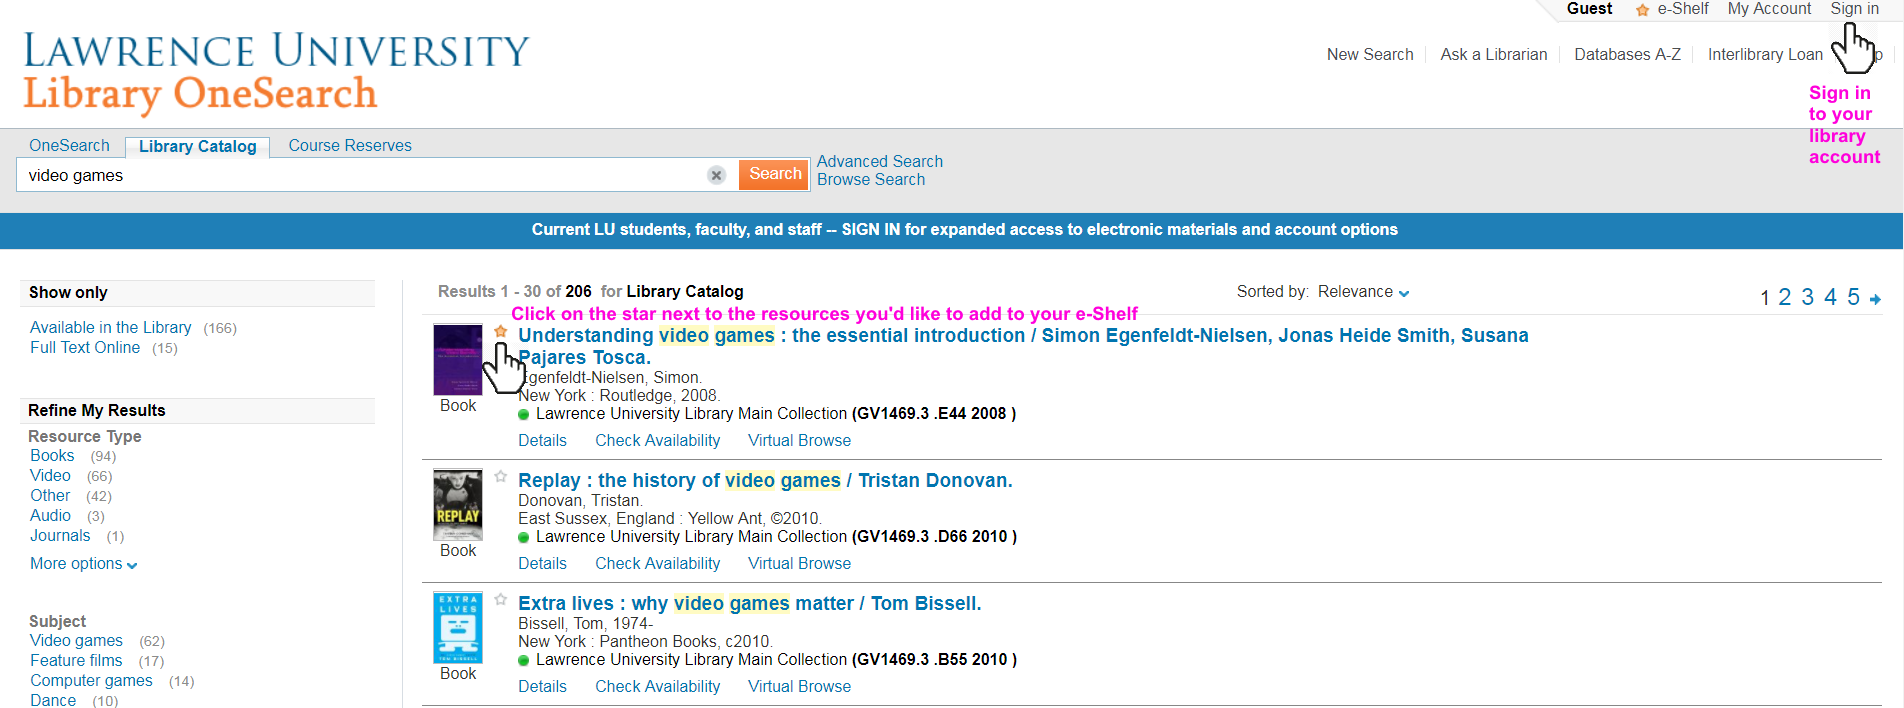
Steps 1 & 2: Click the star next to the item you’d like to save. Log in to your account.
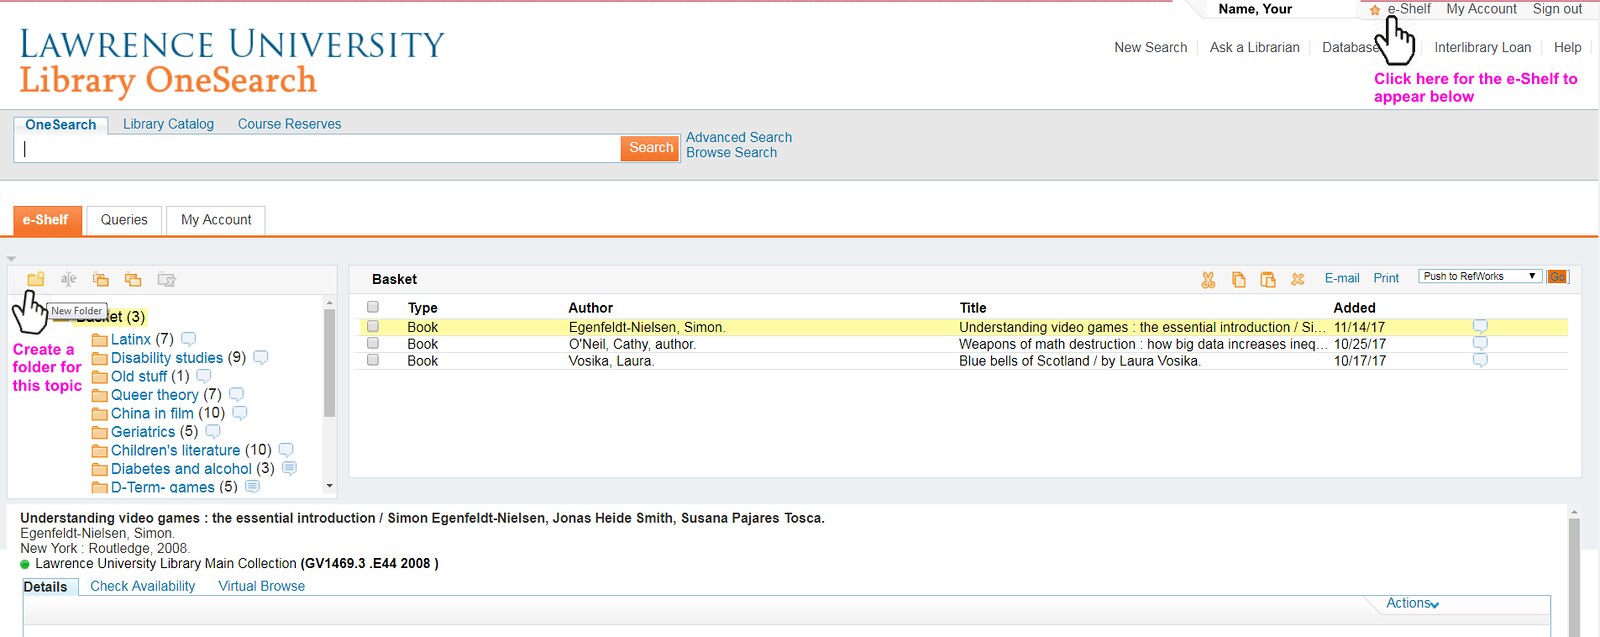
Steps 3 & 4: Click on e-Shelf. Click the new folder icon.
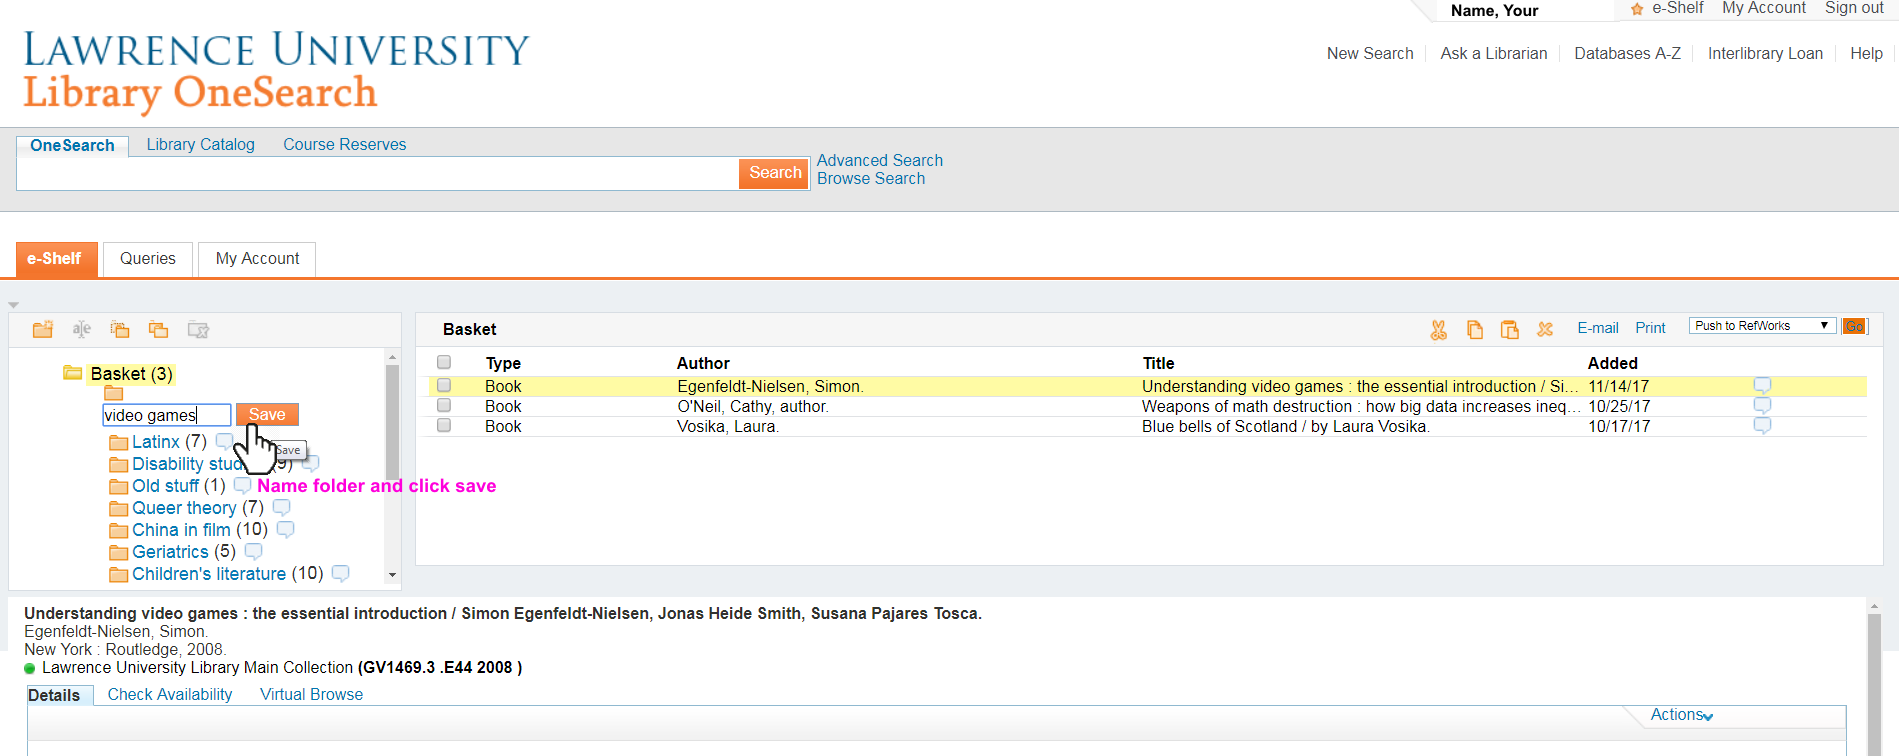
Step 5: Name folder
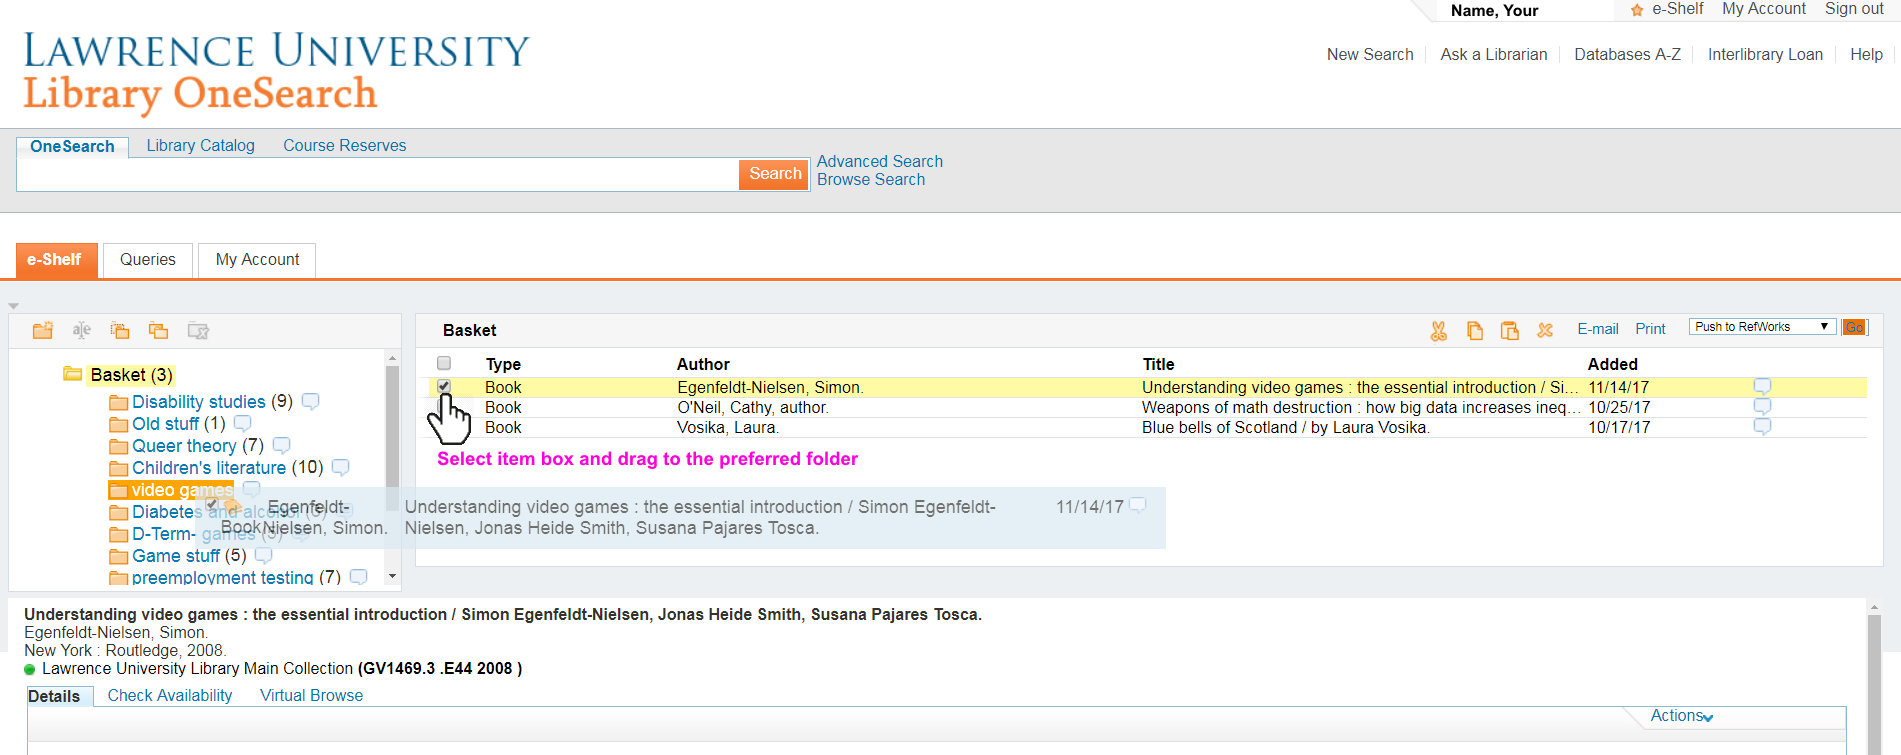
Step 6: Return to basket, click the box next to the item you’d like to move, and drag the item to the new folder.
Items in your e-Shelf folders can be emailed, printed, or sent to your RefWorks account.
Questions? Ask a librarian! We’re happy to help!