By: Harsimran Kalsi

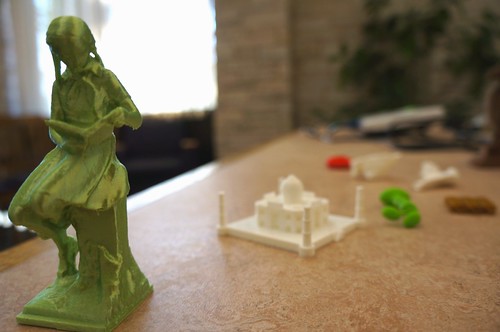
3D printed smartphone microscopy housings and magnifying glass beads.
How did microscopy become a thing? A very brief history of microscopy.
The first microscope is largely credited to having been created by a Dutch man named Antonie Von Leeuwenhoek, during the 17th century (Howard Hughes Medical Institute). Leeuwenhoek utilized a relatively simple apparatus to discover and explore what he called, “animalcules.” His apparatus consisted primarily of a very precisely shaped glass bead, embedded into a handheld housing. Using this instrument, he explored many different mediums (e.g. pond water, blood) and discovered many different microbes (e.g. Daphnia, bacteria, red blood cells).
A replica of Leeuwenhoek’s microscope. Courtesy of Funsci.com
As time continued, more methods of microscopy have been developed and advanced. In modernity, we have crafted various advanced optical/light microscopes capable of viewing samples at 300x magnification. Other methods exist that allow us to analyze samples outside wavelengths of light suited for the human eye (e.g. infrared, ultraviolet). Methods such as scanning electron microscopy and transmission electron microscopy manipulate electrons to obtain highly detailed images of greater magnifications. These methods can magnify samples anywhere between 1,000x-30,000x (depending on the particular method).
Why study the microcosm?
Most life on earth is completely invisible to the human eye, without the aid of a microscope. Looking at the tree of life, one can see that most of it is microbial and that a small sliver/branch of it, actually constitutes what we can see. This vast, teeming, beautiful, and barely explored microcosm can often go overlooked every moment.
Though these microbes may go overlooked, that by no means implies that they have little affect on the way our world is. In fact, these microbes have a profound effect. Bacteria cover everything including our own skin. They also live within many organisms (including ourselves) and help us in several ways. However, many microbes can make us extremely sick and with the current state of increasing global antibiotic resistance, it is crucial that we understand more about these organisms to maintain our own well-being.
Types of 3D printed microscopy
Different methods of 3D printed microscopy have been developed over the past decade, however, the focus of this project will primarily be with one particular method. This method was developed by Pacific Northwest National Laboratories (PNNL) and is very similar to Leeuwenhoek’s first microscope, in a lot of ways. The method consists of 3D printing a housing that hold a glass bead of a specific diameter. The diameter of the spherical glass bead in turn determines the magnification that the microscope is capable of. This apparatus then slips over your smartphone camera and can be used to view certain things.
Benefits of 3D printed smartphone microscopy
The concept of 3D printed smartphone microscopy visualizes many benefits. 3D printed microscopy methods may be far more economically feasible than other microscopy methods. Many microscopes are not cheap, however, if a microscope could be composed primarily of one cheap material (e.g. PLA, ABS) and printed quickly through additive manufacturing techniques, one might be able to print many cheap but efficient microscopes (hence maximizing productivity). Furthermore, these microscopes may be easier to use and deploy in resource poor areas.
Method
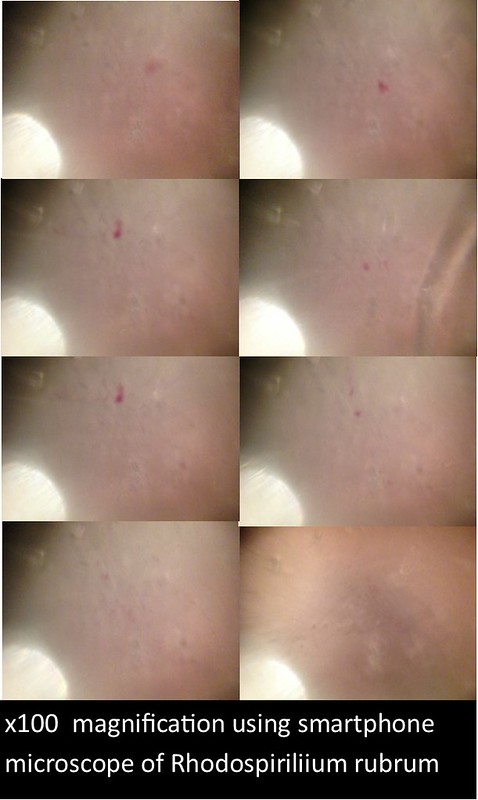
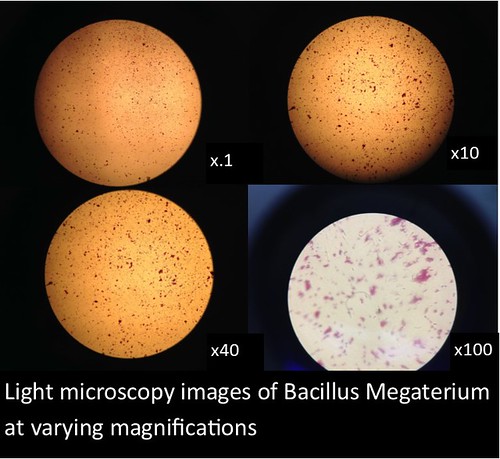
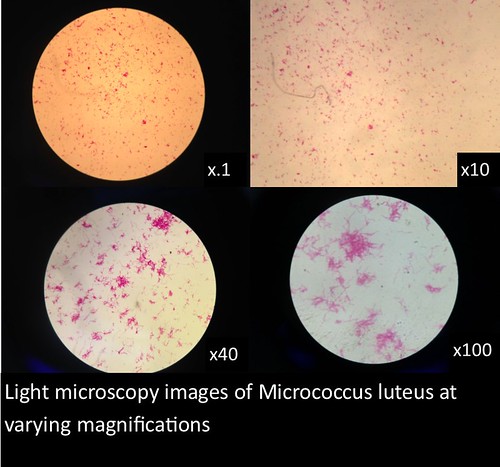
In this project, I used standardized slides with microorganisms of a known type to test the efficiency of PNNL’s smartphone microscope design against that of a standardized light microscope (a Nikon Eclipse E100). The slides consisted of Zea mays, Rhodospirilium rubrum, Bacillus megaterium, and Micrococcus luteus. Efficiency was determined primarily by comparing the magnification, resolution, durability/ease of use, and overall clarity of the smartphone microscopes with the light microscope.
Two magnifications were tested with the smartphone microscope housings: 100x and 350x (with beads of 3.5 mm and 1.0 mm diameters respectively). Many beads provided by the equipment company were not perfectly spherical and had slight imperfections (e.g. small dents, cloudiness, smudges). In this project, the most spherical and clear beads were used and a 70% isopropyl alcohol solution was used to clean the beads before and after use to optimize image clarity. Latex gloves were also used to prevent finger oils and foreign contaminants that might be located on one’s hands from contacting the bead surface.
.Stl files for the housings were obtained from PNNL’s website and the bead holes were expanded post printing, as they were initially too small.
Results
The images and figures below were obtained through analysis of the slides. The smartphone microscope images generally appeared to be of considerably lower quality compared to the light microscope. Images taken with the smartphone microscope often had poor resolution and clarity (so much so that the Zea mays sample was unobservable with the smartphone microscope). This in part might be attributed to imperfections and detritus on the bead surface. On the other hand, the smartphone microscopes were capable of magnifying fairly well, however, the poor resolution and higher sensitivity of these microscopes made it harder to view clear images and control the instrument.
Lighting was also an influencing factor. At times, it was difficult to establish optimal lighting conditions for the smartphone microscope (in contrast to the light microscopes which have a fixed and adjustable light source). Often, imperfections or oil on the bead would lead to strange diffraction patterns of light that wouldn’t illuminate the sample very well.
It also proved an arduous task to insert beads into the housing. At first, the housing files proved too small to house the beads. I ended up expanding the holes within the housings by about 0.3 mm for the x100 magnification and about .1 mm for the x350 magnification. I later created a .stl file with an assay of housings with different sized holes to find the optimal size for each magnification.


Promising future modifications/designs
It seems that this version of the smartphone microscope can still be promising for future smartphone microscopy endeavors. If one finds a way to address just a couple of key issues, this technology could be very efficient. Perhaps, if one found a way to maintain consistent beads with little to no imperfections, it likely would improve the resolution and clarity of the microscope. Also, if someone found a way to optimize the process of embedding the bead into the housing without contaminating, dropping, or losing the bead, that would also make a big difference. Adjusting the print files to house the beads without further adjustment would also improve the overall process.
Recent advances in smartphone microscopy include a smartphone microscope apparatus created by the Centre for Nanoscale BioPhotonics: Arc Centre of Excellence, which is a 3D printed “clip on” that requires no bead whatsoever. The entire apparatus is 3D printed (preferably with black filament) and utilizes ambient light and camera flash to illuminate and magnify samples. More information about how it works can be found here. This method appears to be promising as well.
Acknowledgements
This project could not have been completed without the guidance of Angela Vanden Elzen. Additionally, crucial supplies were provided generously by Wayne and JoAnn of the Biology Stockroom. Thank you to Dr. Jodi Sedlock for allowing me to utilize her lab space. Special thanks also to Dr. Nancy Wall for providing the prepared slides and allowing me to use her lab space/microscope.
References
Howard Hughes Medical Institute. Seeing The Invisible: Van Leeuwenhoek’s First Glimpses Of The Microbial World. 2014, https://www.youtube.com/watch?v=ePnbkNVdPio. Accessed 30 May 2018.
“PNNL Smartphone Microscope – Available Technologies – PNNL”. Availabletechnologies.Pnnl.Gov, 2018, https://availabletechnologies.pnnl.gov/technology.asp?id=393. Accessed 30 May 2018.
 At a presentation to our faculty over the summer, we had the opportunity to share some of the awesome ways our makerspace and its tools and equipment can be integrated into a wide range of academic disciplines. Some of what we talked about is on our assignments by subject page. We were a little worried that all of the new project ideas could be overwhelming, however, especially when many faculty are interested in working with existing courses. In an effort to make things a little easier to digest, we came up with the following:
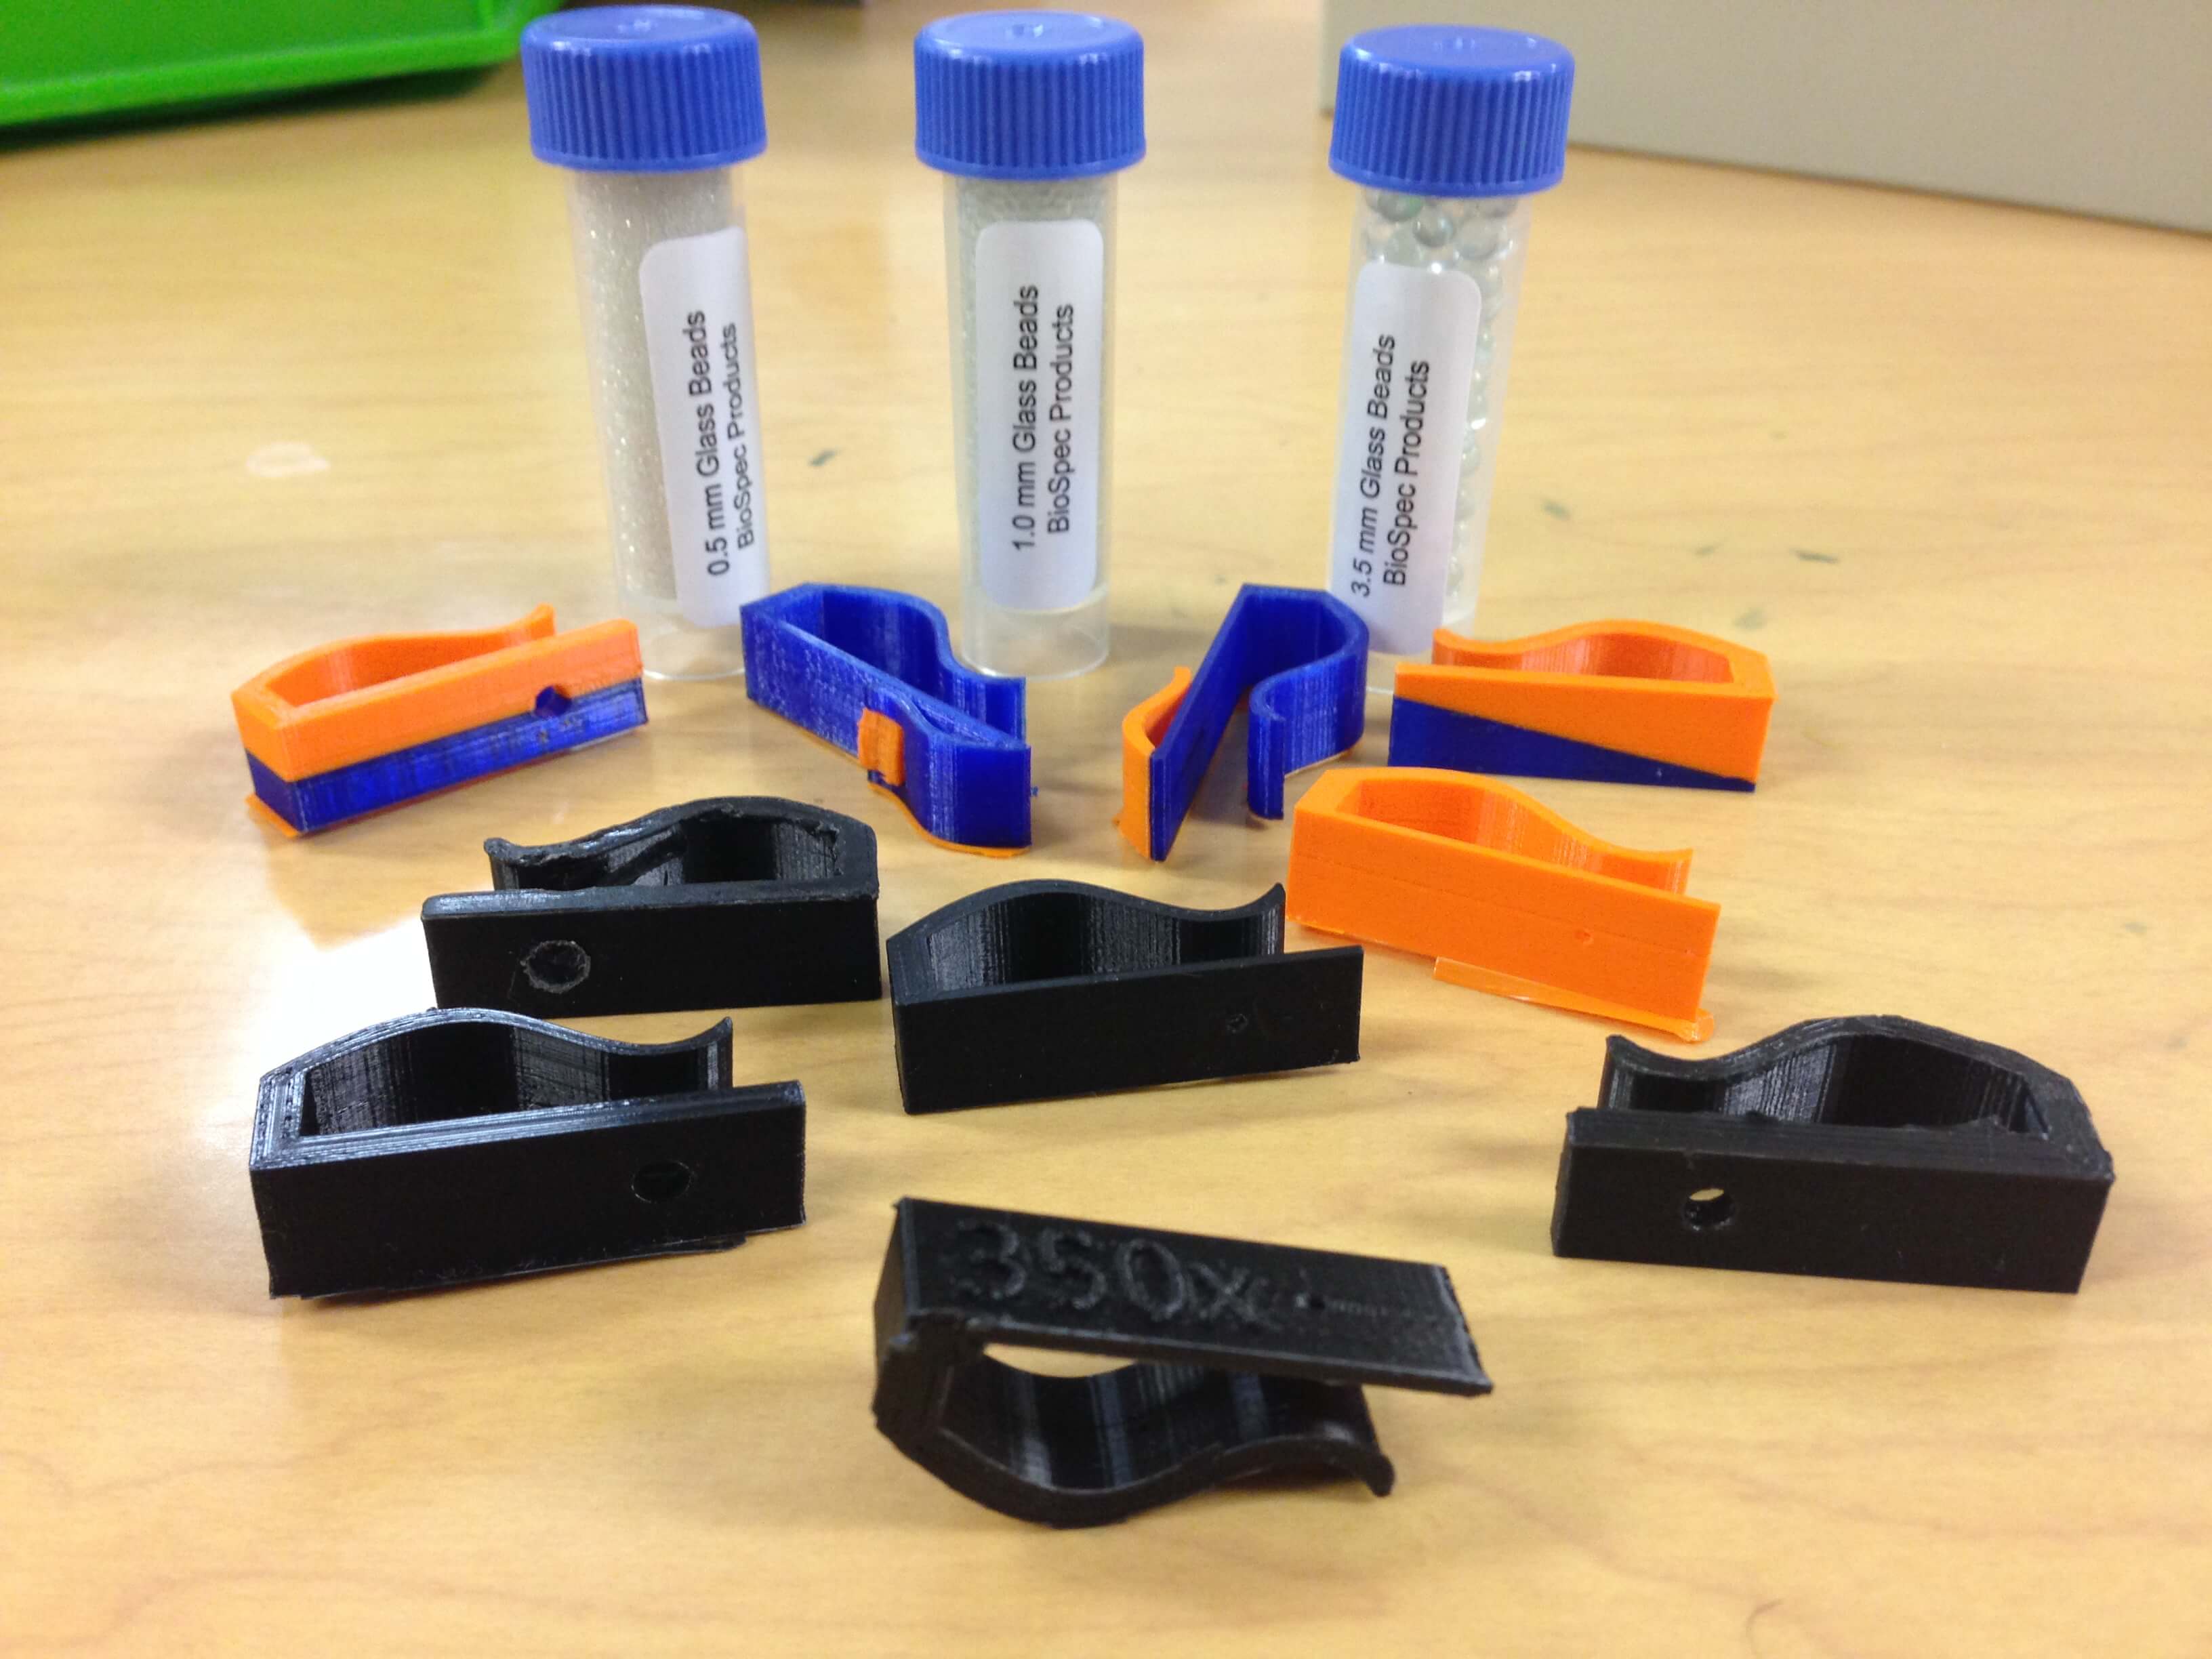

