MyLU Insider

Safety

Category: Safety

Safety Signs: To Alert Workers 

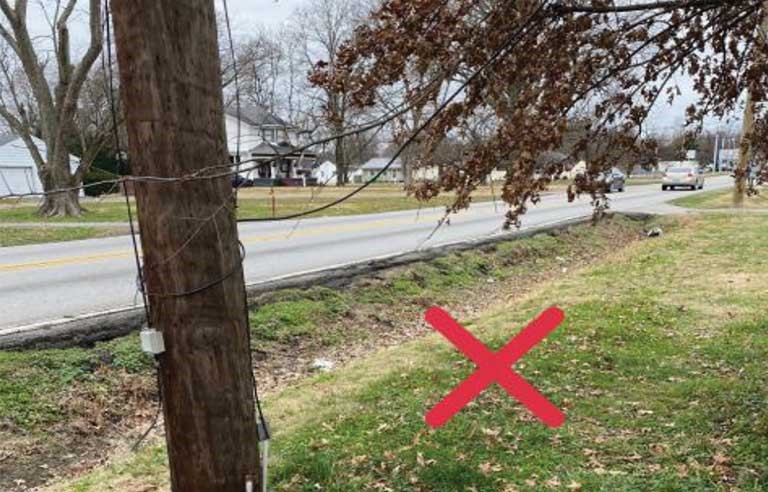
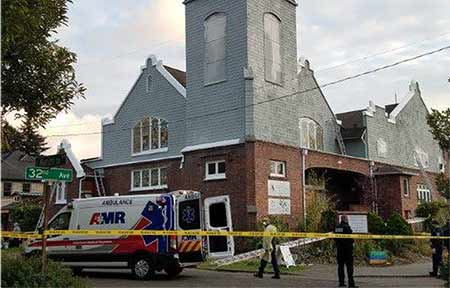
Signs are all around us, are you paying attention to the warnings and messages posted to protect us?

There are many types of safety signs on display that alert workers and visitors to potential dangers at Lawrence University.

The first two of six types of signs, contain instructions on what CAN’T be done or MUST be done:

No Entry sign
No Entry

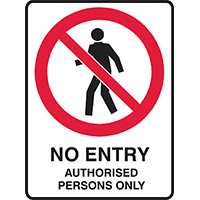
1. Prohibition Signs – CAN’T DO When you need to tell people that they can’t do something, you’ll need a Prohibition Sign – you know, the one with the universally recognizable red circle with a diagonal line through it. Keep people from entering private property with a NO ENTRY sign or signal that people aren’t allowed to smoke in an area with a NO SMOKING sign.

Hearing and Eye Protection Must Be Worn In This Area
Hearing and Eye Protection Must be Worn

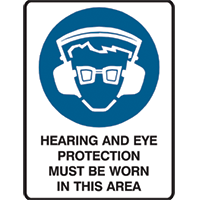
2. Mandatory Signs – MUST DO A Mandatory Sign is a must when you have an instruction that has to be followed. You’ll recognize these by a white symbol or pictogram within a blue circle on a white background. If your workplace requires protective clothing or equipment, for instance, you’ll have seen signs like: Foot Protection Must Be Worn in This Area or Hearing and Eye Protection Must Be Worn in This Area. You can also have just a word message with no image for Mandatory Signs, with the words in black on a white rectangular background.

The next 2 types of safety signs are classified Hazard Signs. These signs are about what could KILL or HURT you:

Danger High Voltage Authorized Personnel Only
Danger High Voltage

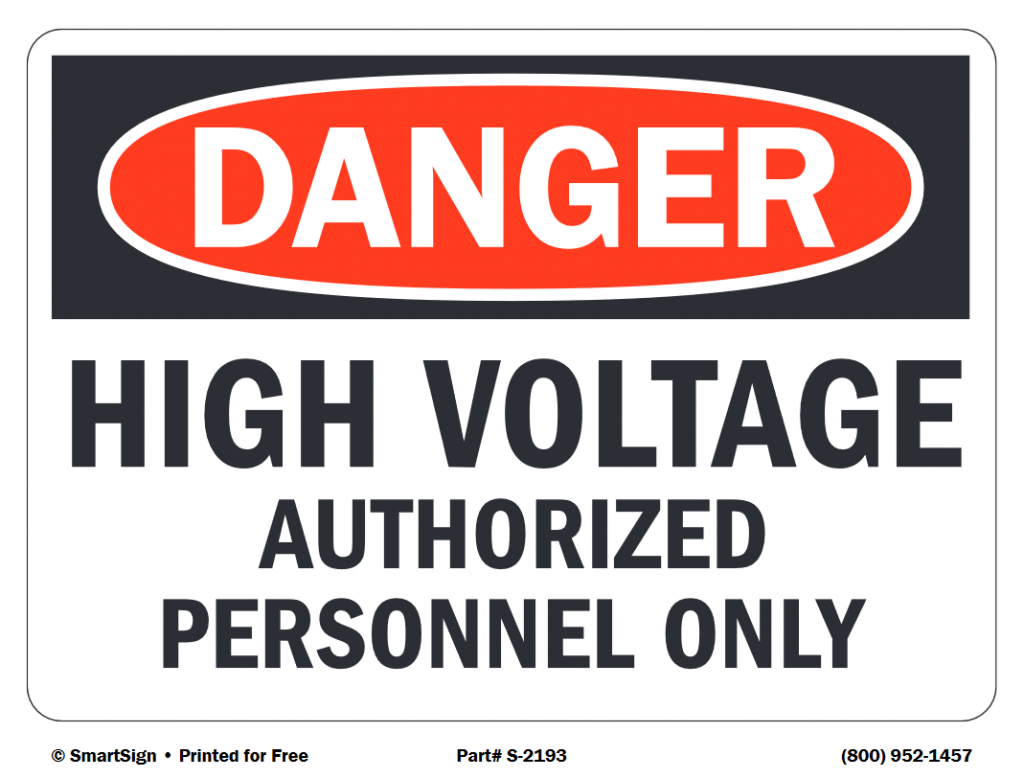
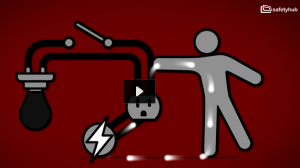
3. Danger Signs – used for hazards that could KILL YOU If you need to warn people about potentially life-threatening hazards or hazardous conditions, you need to use a Danger Sign. The familiar red oval inside a black rectangle with the word DANGER in bold, capital letters, alerts people to the threat. Common Danger Signs include HIGH VOLTAGE and DO NOT ENTER.

Slippery When Wet
Slippery When Wet

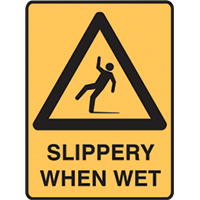
4. Warning Signs – used for hazards that could HURT YOU When the hazard or hazardous conditions aren’t life-threatening, a Warning Sign lets you know you could still get hurt. These are easy to identify with their yellow background and black triangle around the hazard symbol. SLIPPERY WHEN WET is a commonly recognizable Warning Sign.

The last 2 types of safety signs are informative signs:

AED Location
AED Location

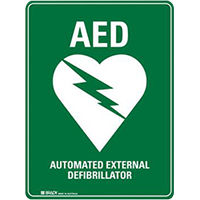
5. Emergency Information Signs – used to identify SAFETY EQUIPMENT If something does go wrong, Emergency Information Signs help people to find the location of, or directions to, your emergency related facilities, like emergency exits, first aid or safety equipment. The green background with white writing and symbols is instantly identifiable for safety, with common signs like, FIRST AID KIT, or EMERGENCY PHONE.

Fire Extinguisher Location

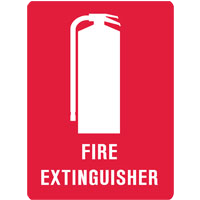
6. Fire Signs – used for locating FIRE EQUIPMENT The bright red of Fire Signs makes them easy to spot around fire alarms and fire-fighting equipment. All text and imagery are white and stands out against the red background. Fire Signs are available to indicate the location of all your fire equipment, like fire extinguishers, fire blankets, fire hoses, and more.

    It’s important that we follow the warnings posted on safety signs to prevent injury or death. They are posted to keep everyone safe on campus.

  Resource: https://www.mysafetysign.com/

Protecting your Hearing from Permanent Damage

Take the time to learn more about sound levels, duration limits, and steps you can take to protect your hearing.

Occupational safety and health professionals use the Hierarchy of Control to determine how to implement feasible and effective controls. This approach groups actions by their likely effectiveness in reducing or removing the noise hazard.

Methods used to control noise levels.

Elimination or Substitution: In most cases, the preferred approach is to eliminate the source of hazardous noise. When elimination is not possible, substitution of the loud equipment for quieter equipment may be the next best alternative to protect workers from hazardous noise.

Engineering and Administrative Controls: To the extent feasible, engineering controls, administrative controls, and work practices shall be used to ensure that workers are not exposed to noise at or above 85 dBA as an 8-hour Time Weighted Average (TWA). Engineering controls require physical changes to the workplace such as redesigning equipment to eliminate noise sources and constructing barriers that prevent noise from reaching a worker. If engineering controls are not feasible, employers an explore potential administrative controls, such as scheduling that will minimize exposure, providing quiet and convenient lunch and break areas.

Personal Protective Equipment (PPE): When all options for eliminating or reducing the noise at the source are exhausted, hearing protection devices such as earplugs or earmuffs should be made available to workers, at no cost, to sufficiently attenuate noise so that their “real-world” exposure is below 85 dBA as an 8-hour TWA.

Sound levels and duration limits.

 Sound level and duration are important to consider when protecting your hearing from damage.

Sound Pressure Level

  • Pressure wave traveling in air or water
  • Expressed in decibels (dB) – It is the perceived loudness
  • Analogy: surface wave made when you throw a stone into a calm pool of water
  • Logarithmic scale
  • Small dB increase represents large increase in sound energy.
  • 3 dB increase is a doubling of sound energy
  • 10 dB increase represents a 10-fold increase
  • 20 dB increase represents a 100-fold increase
Time to Reach 100% of Daily DoseExposure Level per NIOSH RELExposure
Level Lawrence University
Beyond Limits
Protection Required – Noise Reduction Ratio (NRR)
8 hours85 dBA75 dBA – reduced from 85NNR 25
4 hours88 dBA80 dBA – reduced from 88NNR 25
2 hours91 dBA85 dBA – reduced from 91NRR 25 w/ear muffs
1 hour94 dBA85 dBA – reduced from 94NRR 25 w/ear muffs
30 minutes97 dBA85 dBA – reduced from 97NRR 25 w/ear muffs
15 minutes100 dBA85 dBA – reduced from 100NRR 35 w/ear muffs
Noise exposure levels and required personal protection.
Examples of tools and their sound levels by decibels.

Signs of Hearing Loss Include:

  • Frequently asking people to repeat themselves.
  • Turning an ear in the direction of sound in order to hear it better.
  • Understanding conversation better when you look directly at the person. Seeing their facial expression and lips movements can help a someone understand another better is there is a hearing problem.
  • Being unable to hear all parts of a group conversation.
  • Experiencing pain or ringing in the ears (tinnitus).
  • Listening to the TV or radio at volume levels higher than other people normally listen to.

If any of these signs are displayed, a person can take action by visiting an audiologist for a hearing test. An audiologist is a health professional who specializes in diagnosing and treating people with hearing problems.

Video clip of items that produce noise.

PROTECT YOUR HEARING! From ALLY SAFETY

https://www.youtube.com/watch?v=ehV9d7gabfc [8:01]

Hearing Safety Part 1 – CopperPoint Insurance Companies

https://www.youtube.com/watch?v=sjkS2HlaZ0c [8:07]

Sources: https://www.elcosh.org/document/1666/d000573/OSHA%2527s+Approach+to+noise+exposure+in+construction.html

https://www.cdc.gov/niosh/topics/noise/reducenoiseexposure/noisecontrols.html

Common Electrical Hazards and Tips to Prevent Injuries 

Understanding common electrical hazards can help you identify areas for improvement in your surroundings and prevent future injury. Here are several examples:

  • Poorly installed, faulty and/or ill-maintained electrical equipment.
  • Faulty wiring.
  • Overloaded or overheated outlets.
  • Use of flexible leads and extension cables.
  • Incorrect use of replacement fuses.
  • Use of electrical equipment with wet hands or near the source of water.
  • Working near overhead power lines.

Tips to prevent workplace electrical incidents

Electricity can become dangerous if not handled properly. Electricity flowing through a conductor contained in its insulated circuit is necessary for normal daily work activities and mechanical equipment.

It is important to follow these safety tips for preventing workplace injuries:

  • Unplug or switch off electrical appliances when not in use or while cleaning, repairing or servicing.
  • Ensure that all electrical appliances are turned off at the end of the day.
  • Don’t forcefully plug into an outlet if it doesn’t fit.
  • Refrain from running electrical cords across doorways, under the carpets, or in high foot traffic areas.
  • Maintain a clearance of at least 3 feet from all electrical panels.
  • Use only equipment that is double-insulated and properly grounded.
  • Don’t overload the electrical outlets.
  • Ensure that two extension cords are not plugged together.
  • Only use electrical equipment that is approved by a national testing laboratory.
  • Pay attention to the warning signs when operating equipment. Equipment may heat up, spark, smoke or make weird noise; identify the signs and immediately take it out of service.
  • Regularly check for defects in cords and equipment. Report immediately if any and take out of service.
  • While unplugging, grip the plug and pull. Don’t pull the cord from a distance.
  • Do not use electrical equipment or appliances with wet hands or near water and wet surfaces.
  • Inspect the outside work areas for overhead power lines before erecting ladders outside, keep at least 10 feet away from power lines.
  • Follow the warnings posted on signs near potential electrical hazards, such as electrical panels, and high voltage areas.

Please read these three case studies on how electrocutions can happen.

FACE Report: Worker electrocuted while replacing light fixture

December 20, 2020

3-phase electrical panel nameplate.

Case report: #2018OR40
Issued by: Oregon State Fatality Assessment and Control Evaluation (FACE) Program
Date of incident: Sept. 26, 2018

A 28-year-old lighting technician, employed three weeks with a staffing agency and with no electrical trade experience, was electrocuted while working on an energized lighting fixture. He was part of a crew of subcontracted technicians replacing lights at a large retail store chain during a night shift while the lighting circuits were energized. Workplace hazards at the store were not identified, and a trained competent person was not onsite. The foreman believed the lights were on a 208/120-volt single-phase panel, but they were on an energized 480/277-volt three-phase panel. At the time of the incident, the victim was working on a fixture without a quick disconnect. Around 3:30 a.m., co-workers saw the victim slumped over a scaffold, not moving. CPR was initiated and co-workers called 911. Emergency medical services arrived and pronounced the victim dead at the scene. After the victim was removed and law enforcement left, the foreman and remaining crew continued to work, completing the disconnect installation the victim was working on, exposing themselves to similar – and potentially fatal – hazards.

To help prevent similar incidents, employers should:

  • Employers should provide written procedures and training to ensure workers are able to safely perform potentially hazardous tasks.
  • Have a competent person onsite to identify and mitigate safety hazards, and to stop work when an injury occurs.
  • Require that workers de-energize circuits and use lockout/tagout procedures before performing work.

FACE Report: Field technician electrocuted after contacting downed power line

November 28, 2021

Downed overhead power line wrapped in a tree.

Case report: #20KY065
Issued by: Kentucky State Fatality Assessment and Control Evaluation Program
Date of incident: Nov. 4, 2020

A 31-year-old field technician was part of a two-person engineering crew tasked with surveying power lines in a residential area with homes located on each side of a two-lane highway. The technicians worked their way from pole to pole, collecting data such as pole height, distance between poles and each pole’s proximity to the highway. During the course of their duties, the technicians encountered a downed power line, likely the result of a recent windstorm. The downed power line was entangled in a nearby tree that stood about 8 feet from the utility pole. After the victim located the downed line, he worked to free it from the tree. Although the line was not initially energized, it became energized at some point during the untangling process and delivered an electric shock to the victim, killing him instantly. The cause of death was listed as high-voltage electrocution.

To help prevent similar occurrences, employers should:

  • Consider developing policies and procedures that specify the standard operating procedures for employees who encounter a downed power line.
  • Perform a job hazard analysis.
  • Provide hazard awareness training to employees annually.

FACE Report: Father and son painters killed when ladder contacts power line

February 20, 2022

Building with overhead power lines that were involved in the incident.

Case report: #71-210-2021
Issued by: Washington State Fatality Assessment and Control Evaluation Program
Date of report: Nov. 7, 2020

A 55-year-old painting contractor and his 27-year-old son were electrocuted when the aluminum extension ladder they were moving contacted an overhead power line. On the day of the incident, the wind was blowing 15-30 mph, with gusts up to 40 mph. The crew had finished painting for the day and was cleaning up the site. The contractor and his son were moving the ladder, which was at its full extension of 48 feet. The two were holding the ladder in a vertical position as the son attempted to retract the ladder’s extension. A gust of wind blew the ladder into a 14,460-volt overhead power line, and an electrical current traveled from the power line through the ladder and through both workers. The contractor died at the scene. His son died nearly a month later.

To prevent similar occurrences, employers should:

  • Identify the location of overhead power lines as part of an initial worksite survey for jobs involving the use of ladders. Note power line heights and distances from work areas on site diagrams.
  • Perform a job hazard analysis of the worksite.
  • Use non-conductive ladders around power lines.
  • Lower extension ladders and transport them horizontally.
  • Be aware of windy conditions while moving a ladder near power lines.

Sources:

https://safety-culture-training.com/uploads/pdfs/Week18safetytopics-ElectricalSafety.pdf;

Fatality Assessment and Control Evaluation (FACE) Program – https://www.cdc.gov/niosh/face/default.html

Effects of Electrical Current on the Human Body

Most workplaces are literally surrounded by a maze of electrical circuits. Cables, conduits and extension cords deliver electricity to plant, equipment appliances and lights.

Electricity is a convenient, cost effective and surprisingly safe source of energy in every workplace. We should however not become complacent about the potential hazards associated with electricity. Even though there are relatively few accidents associated with electricity, many of the accidents that do happen have serious or devastating results.

The Three Basic Rules That Apply to Electricity

            Rule #1 – Electricity will only travel in a circuit (continuous path from its source to the appliance or piece of equipment and back to its source via a different path).

Normal circuit, switch closed – light on.
Open circuit, switch open – light off.
Circuit flowing through a person after contact with live wire.

            Rule #2 – Electricity will always travel in the path of least resistance.
            Rule #3 – Electricity will always try to travel to the ground.

Basic facts – definitions and explanations of basic electrical terms.

List of conductors and insulators.
Voltage pressure and current flow.

Voltage analogy is similar to water in a hose with the nozzle turned off, we have water pressure but no movement. A good analogy of current is like the flow of water through a hose.

Voltage (Volts) divided by resistance (Ohms) equals current (Amperes).

We can measure the flow of electricity or current using Amperes.

Effects of Electrical Current on the Human Body

Electric current is able to create severe burns in the body. The reason is hidden in the power dissipation across the body’s electrical resistance.

The contact with electric current can have various effects on the human body such as pain, burns or even death. There are many factors which effect the way the body interacts with current, such as skin resistance, the voltage, the length of time of contact, the amount of electric current and its intensity.

The body is extremely sensitive to the effects of electric current, that’s why this scenario can lead to a variety of outcomes. The real measure of electrocution intensity is directly related to the amount of current (Ohms law), in amperes, that passes through the body depending on the body resistance, wet (500Ω) or dry (1000Ω) and point of contacts we have very different effects for the same current.

Contact with an electrical current disrupts normal operation of our nervous and muscular systems, and when this current passes through your body, it is transformed into thermal energy. This can cause serious burns, both inside your body and on your skin.

The longer the current continues to pass through you, the worse it gets. More heat is generated and the damage to your body increases, so the inability to let go can cause some serious problems.

Effects of Electrical Current Contact for 1 Second (Electrocution or Electric Shock)

Below 1 mA – Not perceptible

1 mA – Threshold of feeling, tingling

5 mA – Slight shock. Not painful. Average individual can let go. Involuntary reaction can lead to indirect injuries.

6-25 mA (women) – Painful shocks. Loss of muscle control.

6-30 mA (men) – Freezing current, “can’t let go”. The person may be thrown away from the power source. Individual cannot let go. Strong involuntary reaction can lead to involuntary injuries.

50 to 150 mA – Extreme pain. Respiratory arrest. Muscle reactions. Possible death. Currents above 100 mA are almost always fatal unless immediate medical attention is provided.

1-4.3 A – Fibrillation of the heart. Muscle contraction and nerve damage occur. Likely death.

10 A – Cardiac arrest, severe burns. Death is probable. (most common size for circuit breakers for switches and outlets)

Cardiac effects are among the most serious and among the most common electrical injuries. The heart is more commonly affected because the electric current usually follows the path of least resistance in the body along blood vessels and nerves, directing the current towards the heart.

Effects on the body caused by contact with a live wire.

Sources: Physiological effect of electric current. WikiLectures.eu, Safetyhub Electrical Safety Short.


Selecting the Correct Footwear to Prevent Slips, Trips, and Falls

One of the most common and important control measures for slips and trips is footwear.

What are the main causes of slips, trips, and falls at Lawrence University? (When it’s not related to Winter – ice and snow)

  • Uneven surfaces, sidewalks
  • Wet/slippery floors (tracking inside after rain storms)
  • Changes in walking surface; stairs, steps, curbs and ramps

The Right Safety Footwear Makes a Big Difference

Is slip resistant the same as non-slip?

There are two main differences between slip resistance and nonslip. First, nonslip shoes have a very flat surface, while slip-resistant shoes have a large surface area with indents in them. The indents in the shoe help to grip the surfaces that you are walking.

How to Select the Right Footwear to Reduce Tripping

When choosing safety footwear, here are the most important things to consider to avoid tripping.

  • Ensure Proper Fit. The larger the shoe is compared to our foot, the higher our chances of misjudging the clearance over obstacles and, therefore, the higher our chances of tripping.
  • Boots Over Shoes. In an environment where tripping is a concern, a boot is a better choice than a low-cut shoe. Many accidents and injuries happen when we try to readjust our position after tripping, and a boot (provided the laces are tied) will provide additional stability to the ankle, which will minimize the risk of ankle injury when you put pressure on your foot or leg to maintain your position.
  • Look for Certified Slip-Resistance. Make sure the shoe or boot you’re buying is branded as slip-resistant. Specifically, look for brands that are certified ASTM F2913, now up to its 2019 revision. This will ensure that the slip-resistant claim is backed by rigorous testing.
  • Match the Footwear to the Walking Surface. The non-slip properties of safety shoes are expressed in relation to a specific walking surface. Make sure the footwear’s anti-slip properties will actually provide additional traction on the types of surfaces in your workplace.

Tests are most commonly done on three conditions: Dry /Wet / Hi Soil Oily/Wet

Ratings are then given based on a coefficient of friction, varying from 0 to 1.

If you’re considering a safety boot for outdoor work, for example, and it has a coefficient of friction of 1 for Dry conditions but only 0.2 for Hi Soil Oily/Wet, you should look for another boot. The boot may work perfectly well on dry surfaces, but outdoor work means a chance of encountering wet or muddy surfaces.

  • Check the Tread. While no specific tread pattern is better than any other, one that has fairly deep treads will do a better job of channeling out water, oil, or mud, which will generally give it better traction. However, for some wet or oily surfaces multiple narrow channels provides superior traction.

As the tread wears out, the performance declines. So, it is possible for shallower treads to wear out more quickly compared to deep, lug outsoles.

Most slips and falls occur on wet surfaces.

Resources:

https://nfsi.org/nfsi-research/quick-facts/  https://www.safeopedia.com/selecting-the-right-work-shoes-to-prevent-slips-trips-and-falls/2/7549

Road Work Zones

Road work zones are necessary for the upkeep and improvement of Wisconsin’s infrastructure, and every year thousands of hard-working men and women participate in street, highway and bridge projects statewide. While all roadwork is temporary, the decisions – and mistakes – that drivers make in work zones can have a lasting impact.

There are unfortunately thousands of crashes in our work zones every construction season. Drivers and passengers – not workers – make up the vast majority of those either hurt or killed. It’s in every driver’s best interest to stay focused and patient – especially in work zones. Keep in mind that even at a reduced speed limit of 55 mph, a vehicle travels 80 feet per second and can clear a football field in the time it takes to glance at a phone or a radio dial. Combine the speed factor with narrow, shifting lanes and the chances of a crash can dramatically increase.

Any time people are working in a street or highway near traffic, drivers and workers are at risk:

  • Major road construction
  • Emergency vehicles at the side of the road
  • A snowplow flashing its warning lights
  • Everyday garbage pickup

In Wisconsin, they’re all work zones. Being able to identify the work zones up ahead can save lives. So, it’s best to learn the signs of a work zone.

Any combination of orange barrels, orange signs, flags, flagging operations, workers, or flashing lights may be involved. You might also see utility, maintenance or emergency vehicles. Surefire details include “work ahead” signs and, of course, workers.

Orange signs are used to communicate to drivers that they are entering, leaving or already in a work zone. Below are common examples of what you’ll see, so when you see any orange signs or barrels take extra caution. Workers are likely nearby. 

Road Work Ahead – Slow Down – Expect construction.
Flagger Ahead – Slow down and be prepared to stop.
Right Lane Ends – Merge carefully. Take turns. Be patient.
Two-Way Traffic – Be alert. Traffic in the opposite direction will be next to you.

In Wisconsin, we take work zone safety seriously. The penalties for careless driving are steep. ​

  • It can cost you money. A normal speeding ticket can be expensive, but that’s nothing compared to traffic violations made in the zone. In a work zone, penalties are doubled – and fines usually increase every year.
  • It can cost you time. The consequences for injuring or killing someone in a work zone are especially serious. Careless drivers may face thousands of dollars in fines and up to 31/2 years in prison if they injure someone in a work zone. The fines for vehicular man​slaughter are even higher, as are the prison terms – as many as 10 years. These punishments may increase if the driver was intoxicated or a repeat offender.
  • It can cost your life. The greatest cost of irresponsible driving isn’t calculated in dollars or years. Wisconsin sees nearly 2,000 work zone crashes a year. Sometimes, people die. And those tragedies change the lives of everyone left behind – workers, drivers and passengers, family and friends.

If you break down in a work zone

Whether it’s a blown tire or running out of gas, breakdowns​ are never a good thing. They can be especially challenging in road construction zones. It’s crucially important for motorists to be aware of their surroundings to stay safe. Wisconsin is one of many states that operates highway safety patrols for basic roadside service in some major work zones. This is done in the interest of keeping everyone safe ​by relocating disabled vehicles, brushing away debris and helping to manage traffic.

Worker lifting car with a jack.

If you do break down in a work zone, it’s important to keep cool and follow these guidelines:

  • Turn on your hazard lights. It’s important to warn other motorists of your presence.
  • If you are OK and your vehicle is drivable, the Wisconsin Steer It, Clear It law requires you to move your vehicle to a safe location, away from traffic. Look for ramps or temporary pull-off zones.
  • Dial 911 for assistance, especially if your vehicle is inoperable and blocking a lane of traffic, or if someone is hurt. However, keep in mind that Wisconsin’s highway safety patrols are often just moments away, so if help shows up before you can reach the phone, please refrain from dialing 911.
  • Stay in your vehicle with your seat belt fastened. Your vehicle is typically the safest place to await roadside assistance. If you get out of your vehicle, you risk exposing yourself to potential work zone hazards such as unprotected drops, rough walking areas or construction equipment.  
  • Keep contact information for your insurance company or roadside assistance provider with you. ​
  • Know where you are, especially if you do need to call for help. Being aware of mile markers or guide signs will make it much easier for someone to find you.
  • Be prepared. It’s a good idea to keep a few items in your car to help in the event of a breakdown, including a visibility vest, a charged mobile phone, a first-aid kit, a warm blanket, extra clothing, water and snacks.

Drivers involved in a crash should do the following:

  1. Check for injuries. Call 911 if anyone is hurt. Provide accurate information about the location of the incident, severity of injuries, and number of lanes blocked.
  2. Stay safe and calm. Watch for traffic, stay inside the vehicle with a seat belt on while waiting for help.
  3. If you can steer it, clear it. Move out of traffic if the vehicle is not disabled.
  4. Turn hazard lights on or raise the hood of the vehicle to warn other drivers of the incident and avoid secondary crashes.

“Steer It, Clear It” became law in Wisconsin in 1998 and grants immunity from civil damages to anyone who clears the crash scene at the direction of law enforcement.

Drivers should also be aware of what to do when an emergency vehicle approaches on the roads. State law requires drivers to yield the right of way and pull over when an authorized emergency vehicle has its lights or sirens activated. Stay parallel to the right curb or right edge of the shoulder, clear of any intersection, until the emergency crews pass through the area.

Drivers are advised to “know before you go” by checking 511wi.gov before any road trip. ​

Map of crashes in the Appleton area in 2022.

Learn more about safe driving in work zones.

Sources:

https://wisconsindot.gov/Pages/safety/education/workzone/default.aspx https://transportal.cee.wisc.edu/partners/community-maps/crash/search/BasicSearch.do

Disaster Safety – Electrical Dangers

The Electrical Safety Foundation International (ESFI) warns consumers to be aware of electrical dangers associated with severe storms and the resulting floods and power outages.

Deaths and injuries during the summer months are frequently caused by post-storm electrical hazards. The high winds, extreme rains, and flooding caused by hurricanes and tornadoes present many unique dangers. ESFI offers consumers important advice about how to help prevent electrically related deaths, injuries, and property loss by taking a few precautions during and after severe storms and other natural disasters.

Damage to power lines and transformer after a storm – Stop! Stay at least 35 feet away. (Source: ESFI)

While we can’t prevent natural disasters, we can ensure our businesses are electrically safe before and after the storm. Practicing electrical safety and being prepared can lead to a smooth recovery and an opportunity to renovate the electrical efficiency of your business.

 In the Event of a Natural Disaster

  • Create emergency shutdown and start-up procedures
  • Turn off power sources
  • Charge all electronic communication devices
  • Unplug and elevate electronics

After the Storm

  • Avoid flooded areas
  • Always use a Ground-Fault Circuit Interrupter (GFCI) and transfer switch with portable generators
  • Have a qualified electrician inspect any submerged or water-damaged electrical equipment

Prepare for Future Storms

  • Micro-grids can prevent long term power outages by providing localized generation and storage
  • Smart grids provide smart distribution along with self-healing and autonomous restoration of power
  • Having energy sources and major equipment on higher floors may prevent water damage during future storms

Water damaged equipment that must be replaced 

  • Arc-Fault and Ground-Fault Circuit Interrupters
  • Batteries
  • Lightning, ballasts, and LED Drivers
  • Low and Medium Voltage Fuses
  • Molded-Case Circuit Breakers
  • Outlet and Junction Boxes
  • Receptacles
  • Signaling, Protection, and Communications Systems
  • Surge Protective Devices
  • Switches and Dimmers
  • Transformers
  • Uninterruptible Power Supply
  • Wire or Cable (for dry areas)

Water damaged equipment that may be reconditioned

  • High Voltage AC Circuit Breakers
  • Low and Medium Voltage Switchgear
  • Low-Voltage Power Circuit Breakers
  • Motors
  • Panelboards
  • Switchboards
  • Wire or Cable (for wet areas that have not been damaged/ends not exposed)

ESFI has teamed with the National Electrical Manufacturers Association to provide a detailed explanation of what electrical components can be reconditioned and which need to be replaced.

Visit ESFI’s full suite of Disaster Safety resources.

Source: https://www.esfi.org/disaster-safety/

Another Rain Delay – Perception and Reaction Time

Rain, sleet, snow, and fog complicate highway transportation, making driving conditions hazardous and often causing worse-than-normal congestion.

Image of a typical view from driver’s seat during wet weather.

Drivers should use extreme caution and slow their speed when the road is wet or icy. Avoid any sudden changes in direction when conditions are poor. If you see a slippery when wet road sign during poor driving conditions, start slowing down.

Rain and Flooding

Rain causes wet pavement, which reduces vehicle traction and maneuverability. Heavy rain also reduces visibility distance. Rain and wet pavement increase crash risk as well.

Most weather-related crashes occur on wet pavement and during rainfall.

  • Each year, 75 percent of weather-related vehicle crashes occur on wet pavement and 47 percent happen during rainfall.
  • Nearly 5,700 people are killed and more than 544,700 people are injured in crashes on wet pavement annually.
  • Every year, over 3,400 people are killed and over 357,300 people are injured in crashes during rainfall.

A critical factor affecting an operator’s capability is perception-reaction time:
Perception is the individual’s recognition of a hazard, or the need to react. Reaction is the individual’s ability to respond to avoid the hazard.
Perception-reaction time can determine whether a crash will occur, or not. The shorter the perception-reaction time, the sooner the operator provides input to the vehicle and starts maneuvering to avoid the hazard.
The vehicle continues moving at the same speed toward the hazard during the time it takes the driver to perceive and react. Perception-reaction time becomes critical as speed increases. At slower speeds, the vehicle does not travel much distance during the time it takes the driver to react.

At higher speeds, the vehicle will travel more distance during the same time interval placing it closer to the hazard before the driver starts providing the necessary inputs. Therefore, even fractions of a second are important.

Image example of total stopping distance in dry conditions.

Vehicles moving at higher speeds have more momentum than vehicles at lower speeds. More braking force must be applied to vehicles traveling at high speeds:
• At 20 mph, the average vehicle will travel an additional 18 feet after the brakes are applied for a total stopping distance of 62 feet
• At 50 mph, the vehicle will travel an additional 111 feet for a total stopping distance of 221 feet
• At 80 mph, the vehicle will travel an additional 284 feet for a total stopping distance of 460 feet

When your tires are in contact with the road, they create friction which directly affects the handling and stopping capabilities of your vehicle. The amount of friction created can vary between different types of roads, weather conditions and the amount of tread remaining on your tires.

Most passenger car tires begin with 9 or 10/32nds of usable tread; light truck tires and winter tires may have more. The amount of tread is especially important on wet roads, as the tread grooves help your tires displace water to stay in contact with the road. You can see how tread wear impacts stopping distance illustrated below.

Tread depth chart shows the different stopping distances at different tread depths.

Hazards that can be avoided at low speeds may be unavoidable at higher speeds.

Human reaction time does not change for higher speeds. Higher speed increases crash severity. When the driver’s capability is overwhelmed by higher speeds, the chances of a collision are increased. The higher speed also increases the chances of death or serious injury.

The extent of crash damage depends upon the amount of energy present. The faster a vehicle is moving, the more kinetic energy it takes into a crash. The amount of kinetic energy increases greatly with only slight increases in speed. As the amount of energy increases, the chances of a fatality increase. A collision at 60 mph is 50 percent more likely to result in a fatality than one at 45 mph. A collision at 70 mph is four times more likely to result in a fatality than a crash at 45 mph.

Sources: https://www.nhtsa.gov/sites/nhtsa.gov/files/documents/core_participant_manual-smd-2018.pdf.;  https://highways.dot.gov/public-roads/novemberdecember-2004/another-rain-delay ; https://www.discounttire.com/learn/stopping-distance

Manual Materials Handling – What can make it Hazardous?

Manual materials handling (MMH) means moving or handling things by lifting, lowering, pushing, pulling, carrying, holding or restraining. Manual materials handling is also the most common cause of occupational fatigue, low back pain and lower back injuries.

What makes manual materials handling hazardous?

MMH is always hazardous but the level of hazard depends on what you are handling, what the task is, and what the conditions are at the workplace or work site.

For example, the material or load that you are handling may be:

  • Too heavy for the task that you are doing.
  • Located too high or low for a safe lift.
  • Too big or may have a shape that makes it hard to handle.
  • Wet, slippery, or have sharp edges that makes it hard to grasp.
  • Unstable or can shift its center of gravity because it contains material that can flow (e.g., water, sand, a partially filled drum, or concrete in a wheelbarrow, or many objects within a container that are unbalanced or can shift).
  • Too big to let you see where you are putting your feet.

The task can make MMH hazardous if a worker:

  • Uses poor lifting techniques (lifting too fast, too often or too long; lifting with back bent or while twisting or reaching too far; lifting while sitting or kneeling, etc.).
  • Lifts or handles more than they can control safely.
  • Does not take appropriate rest breaks; insufficient recovery time.
  • Has a combination of handling tasks (e.g. lifting, carrying and lowering).
  • Wears clothing that restricts movement or reduces grip strength.

The conditions where you are working can also contribute to hazards of MMH and result in injuries, for example:

  • Walking surfaces that are uneven, sloping, wet, icy, slippery, unsteady, etc.
  • Differences in floor levels or walking surfaces.
  • Poor housekeeping that causes slip, trip and fall hazards.
  • Inadequate lighting.
  • Cold or very hot and humid working conditions.
  • Strong wind or gusty conditions.
  • Working at high pace.
  • Movement is restricted because of clothing or personal protective equipment.
  • Space is small or posture is constrained or both.

For more detailed information on a particular manual materials handling (MMH) topic, click on the document title below:

Source: https://www.ccohs.ca/oshanswers/ergonomics/mmh

Desk Stretches: See How They’re Done

To prevent or reduce stiffness and pain from sitting all day, try simple desk stretches.

The problem: Prolonged sitting

If you work at a desk or computer for long stretches of time, you might place excessive stress on certain muscles. As a result, you’re likely to get stiff and sore — unless you take frequent breaks for physical activity.

The solution: Fitness breaks

Breaking up your workday with stretches and other physical activities can help keep you comfortable while you work. You can stretch while you’re seated at your desk or standing in your workspace. You might even be able to stretch while you’re participating in a conference call or other workplace activities. You don’t need special equipment to stretch, and you won’t break a sweat — yet the results can be powerful.

Try a few of the stretches below, which can be done right from the comfort of your work area (watch the videos by Mayo Clinic Staff to understand proper form and technique):

  • Neck stretches: Video [1:27]
    Bring your chin to your chest and hold for 15 to 30 seconds. Then rotate your head left and then right, holding 15 to 30 seconds on each side. Finally, tilt your head to the side, leaning your ear toward your shoulder. Again, hold for 15 to 30 seconds on each side.
  • Forearm stretches: Video [1:38]
    Lift one of your arms and hold it comfortably in front of you, palm facing down. Bend your hand downward, and gently pull it toward you using your other hand. Hold for 15 to 30 seconds and repeat on the other side. Then lift one of your arms and hold it comfortably in front of you, palm facing up. Bend your hand downward, and gently pull it toward you using your other hand. Again, hold for 15 to 30 seconds on each side.
  • Upper body stretches: Video [1:22]
    To stretch the back of your shoulders, place one hand under your elbow. Lift your elbow and stretch it across your chest. Don’t rotate your body as you stretch. Hold the stretch for 15 to 30 seconds. You’ll feel tension in the back of your shoulder. Relax and return to the starting position and repeat the stretch with the other arm.
    • To stretch the backs of your arms, lift one arm and bend it behind your head. Place your other hand on your bent elbow to help stretch your upper arm and shoulder. Hold the stretch for 15 to 30 seconds. Relax and return to the starting position and repeat the stretch with your other arm.
    • To stretch the muscles of your chest, squeeze your shoulder blades together. To get a better stretch, place your hands behind your head and pull your bent arms backward. Hold the stretch for 15 to 30 seconds. Relax and return to the starting position.
  • Seated stretches: Video [1:19]
    While seated, bring one of your knees toward your chest. Use your hands to grab the back of your thigh, and gently pull it toward you. Keep your back straight, being careful not to lean forward. Hold the stretch for 30 seconds. Relax and return to the starting position, and repeat the stretch with your other leg.
  • Standing stretches: Video [1:15]
    While standing, put a hand on your desk or chair to stabilize yourself. Bend one leg, grab your ankle and pull it toward your buttock. Hold for 15 to 30 seconds, then repeat on the other side. Then, stand with feet hip width apart and arms crossed across your chest. Twist to the left, then the right. Hold for 30 seconds on each side.

“Just a small amount of movement throughout the day can really help you stay alert and focused.” Beau Johnson is a physical therapist in Holmen, Wisconsin.

Want more stretching examples? Check this out.

15 Simple and Quick Office Stretches to Boost Work Efficiency


Image of overhead stretch being performed by an office worker.

Example number 4, is a natural stretch that we all do when we’re feeling a bit stiff and tired. Simply raise your arms above your head, interlock your fingers and push away from yourself.

Sources: https://www.mayoclinic.org/healthy-lifestyle/adult-health/in-depth/office-stretches/art-20046041; https://www.lifehack.org/articles/productivity/15-simple-and-quick-office-stretches-boost-work-efficiency.html